| Reporting Overview |
| Submit Project Output Reports |
| Tracking project reporting using dashboard PDF download 70KB |
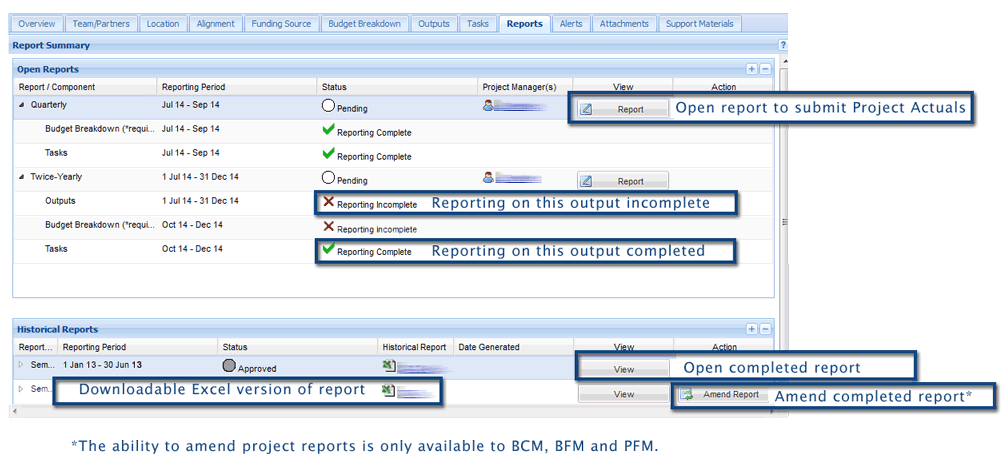
The Reports tab enables all current and future project actuals to be made available for updating by the Project Manager. Once updated, the report is then submitted to the Round Manager for review and approval.
Reporting components or outputs such as Outputs, Tasks and Project Costs (Budget Breakdown) can be configured to be reported at monthly, quarterly, twice-yearly and yearly periods throughout the lifetime of a project. Please see our page on Project Report Templates for more information on configuring these components.

For example, a project could have two reporting periods, one at each quarter and another every 6 months. At the quarterly period, you may only report on some of the reportable outputs such as project costs and tasks. Every 6 months, you would then report on all reportable outputs such as Outputs, project costs and tasks.
Reporting Rules
| PM | RDM | DAM* |
|
|
|
|
Project output reporting involves updating project actuals, adding any outputs that were completed ahead of schedule, including comments about the project, and indicating an overall project status. When the report is finished, the Project Manager submits it to the Delivery Area Manager for review and approval.
In this example, we will be submitting a report that only has Outputs to update. Your report may differ if you have other reportable outputs such as Tasks and Budget Breakdown.
1. Open the relevant project.
2. Select the Reports tab. The Report Summary page gives you the option to select which report you need to complete.
3. The project report status will display as Pending if the report has not been submitted to the Delivery Area Manager. If you select the arrow next to the reporting occurrence, you will be able to see which outcomes have yet to be reported upon.

4. Select the Report button for the relevant period. The Report Details page will display.
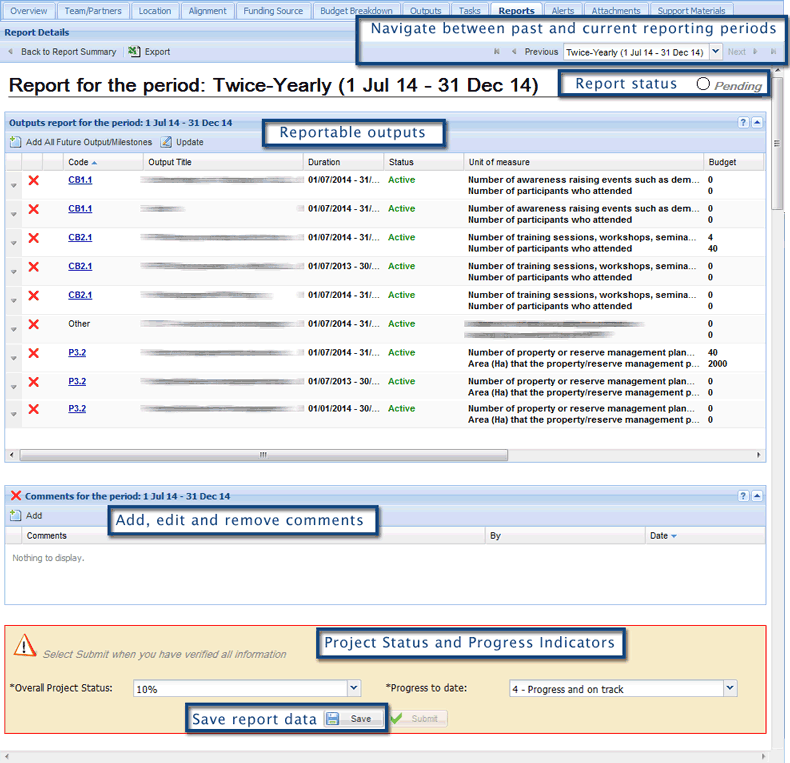
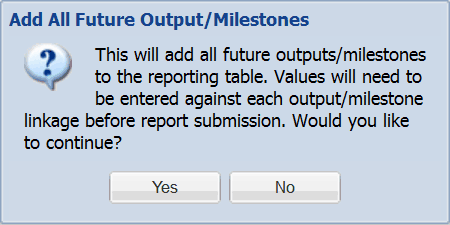
From this page you can also decide to report on future Milestones if your project is delivering ahead of time. To include these future items in your report select the Add All Future Output/Milestones button.

Then select Yes to confirm this decision.
If there are additional unscheduled reportable outputs that the project has delivered, add them within the relevant tab, and then re-edit the project report. In this example, we would add the new Outputs through the Outputs tab.
5. To report on all the available outputs, select the Update button.

This will allow you to edit the Actuals, Percent Complete and include comments about the Output. Output comments are only viewed by the project team. You must enter information into all the text boxes including the Actual and Output comments.
Note: Marking an Output or Task as Completed using the Output Completed? checkbox means it will not display in your project report at the next reporting period.
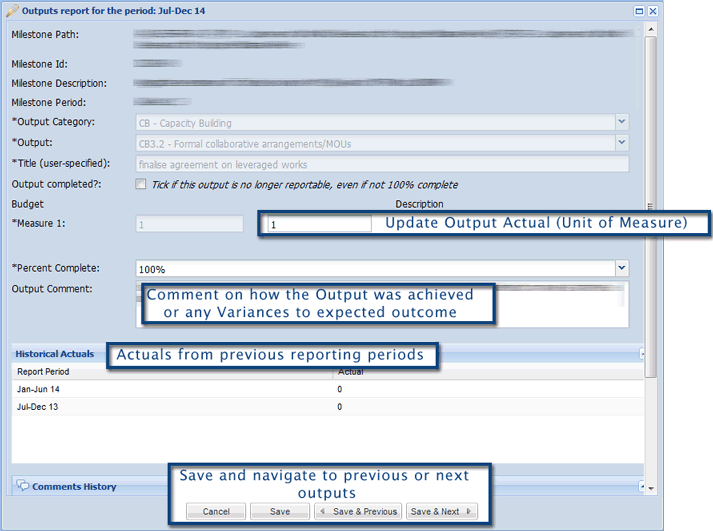
6. Once you have completed entering the first Output's details and have checked their accuracy, you can then move to the next Output. To do this, select the Save & Next button. If you need to correct a previously updated Output, select the Save & Previous button.
7. When all Outputs have been reported on, green ticks will display beside each listed Output.
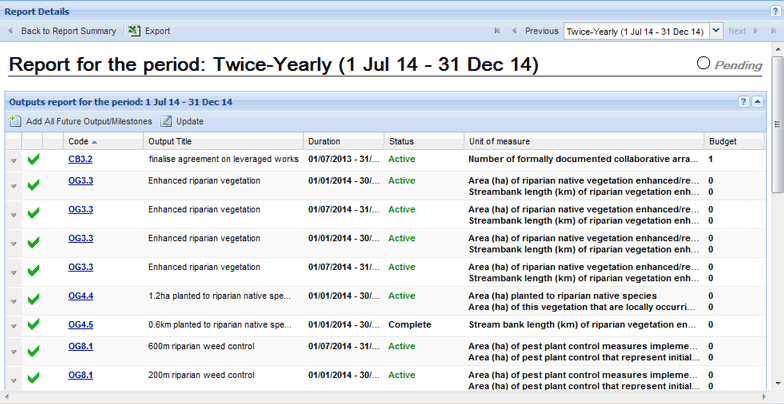
8. You can then proceed to add an overall project comment, and select the appropriate levels for the Overall Project Status and Progress to Date indicators.
9. To add a comment, select the Add button in the Comments section.

10. Enter a statement about the project's progress, and then select Save to create the comment.
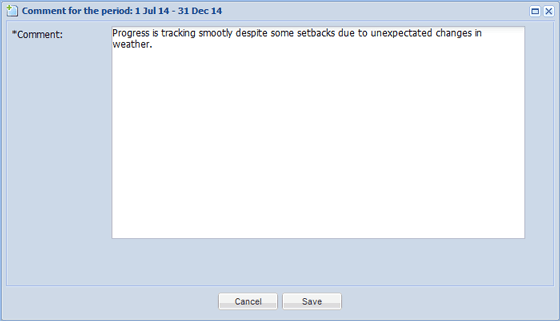
If you need to edit or delete the comment, select the down arrow next to it and then select Edit or Delete from the menu. Note: You cannot edit or delete comments made by other users.

11. To indicate the overall project status and progress, use the drop down menus for each components and select the appropriate choice. Select the Save button to save all the report data if you need to review your report before submission.

If you are submitting the final project performance report to mark a project as Complete, select 100% as the overall Project Status. Select Yes when prompted.
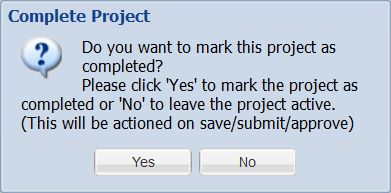
12. Once all mandatory information is entered, the Submit button will become available.
13. Select the Submit button and then select Yes to confirm the submission. If you are a Delivery Area Manager submitting a project report, you will see an Approve button instead.
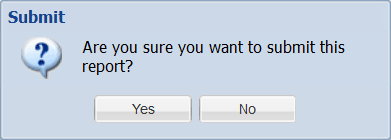
14. The Project report has now been submitted,and Project Managers can no longer edit the report, If you wish to correct the report, contact your DAM to edit the report or request an amendment. An amendment will put the report back into Pending status.
