| PFM | BFM |
BCM |
|
|
|
|
| PFM | BFM |
BCM |
|
|
|
|
| Contract Template Overview |
| Instructions to create a New Contract Template |
| Add User Defined Components to Project Contract Templates |
| Create system alerts for contract steps |
Contract templates can be set up at the group level for use within your group's external projects and applications. These templates can be modified at a project level to include project-only specific information. Changes to the contract at the project level will have no effect on the group template.
For example - your group may have set contract templates for particular delivery agents or business partners. There may be contracts with Government bodies, contracts with community organisations and contracts with landholders. These three types can be added as customisable templates for your group within Enquire. The templates include things such as signature blocks, layout, logos, terms and conditions, contract section order and cover page layout. When applications or projects are entered into Enquire and a contract required to be exported, the project can indicate which template it will use for layout i.e Landholder for the projects with landholders.
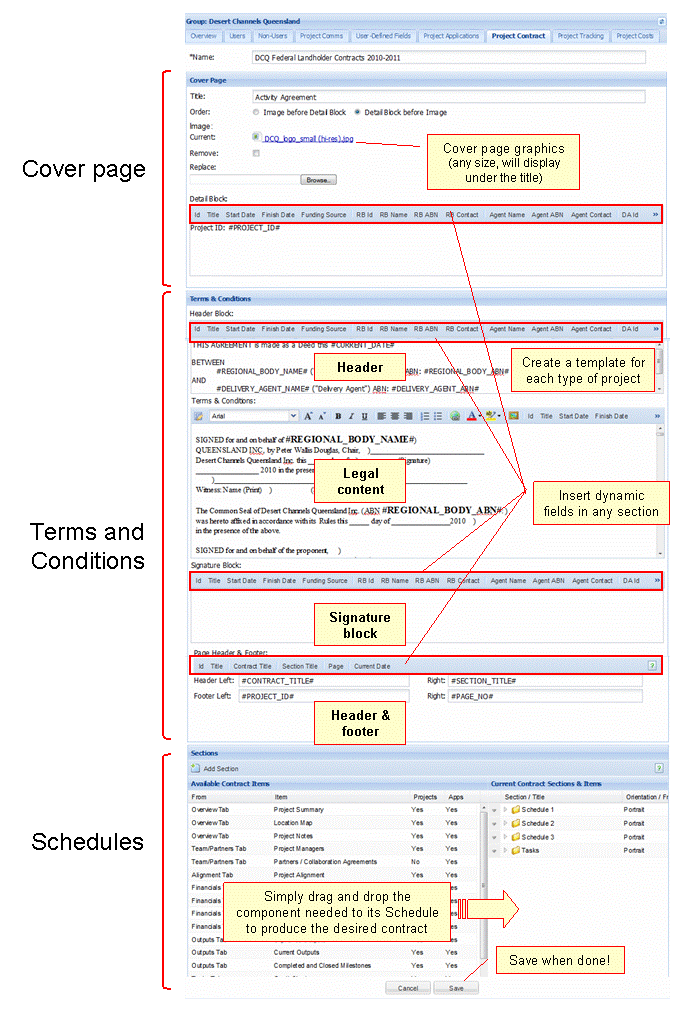
When you begin to create a template you will see the following page. We have detailed instructions below on how to populate each part of the template.
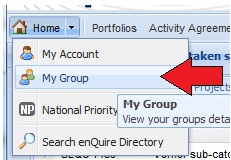
1. Log into Enquire. Select My Group from the drop down menu next to the Home button.
|
2. Select the Project Contract Tab and your current contract templates will be listed. To add a new Contract select Add Contract Type.

|
Note: The next page is quite large and might take a moment to load.
3. Enter a Name or label for the contract template.
4. Cover page.
The Cover Page can consist of a title, an image and a detail block.Only one image can be uploaded, if you have multiple images (for example multiple logos) collate them onto one jPeg and then upload them. The image can also be placed either above or below the Detail Block.
The Detail Block can be written manually and with dynamic Project Details that do not have to be entered manually for your contract. For example, by selecting Project Title, the Project Title will appear in that location on your Cover Page.
If you would like more expand any of the Detail Blocks to view them full screen select the Edit full screen button (  ) on the right hand side of the detail block.
You can also hover over the  to show any Helpful Hints.

|
5. Terms and Conditions
Terms and Conditions consists of the following elements:
a) Header Block - type your header into the Header Block and click on the relevant text field on the tool bar to insert it into the Header Block. These text fields assist with text which are likely to change from one contract to the next, such as Agent Name and dates.

|
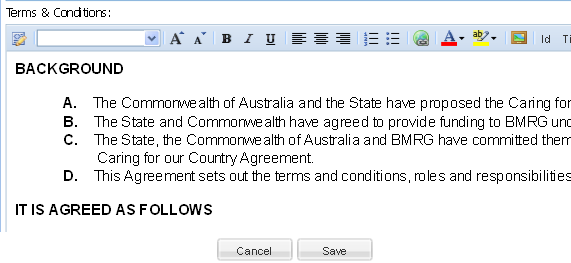
b) Body - Type your text into the Body. If you are cutting and pasting from MS Word we recommend you download the factsheet on using html in your template (PDF download) to assist in formatting.
|
c) Signature Block
d) Page Header and Footer
The Header and Footer works in similar ways to the other Detail Blocks. You can set in Page Numbers, Project ID's and more. Remember this is a template and can be altered at the Project Level.
6. Sections
The sections area is where you construct what other parts, such as schedules (you have already created Cover page, Terms and Conditions) you would like to display within the body of your contract and in what order.
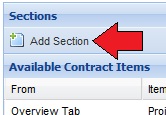
You can add as many sections as you like to your contract. To do this scroll; to the bottom of the page and click the Add Section button.
|
Enter in a Title for the section, the page orientation for the section and details for page header and footer if required. Click Ok to save the section.
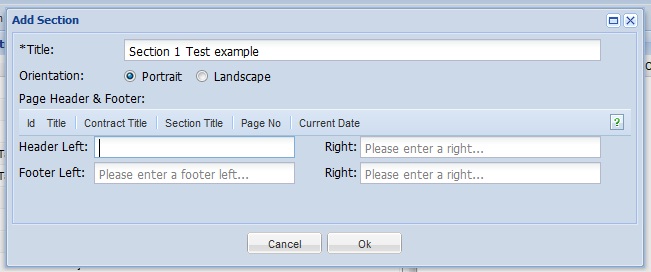
|
View the section under Current Contract Sections & Items. Once you have created a section, you then must indicate what Contract Items you would like to be included within the section. Drag and drop from the left hand side into the new section folder. See the table below titled Available Contract Items explained to find out more about what information is contained in each Item.

|
By scrolling to the right hand side of the Current Contract Sections and Items you can also use the Up and Down buttons to move your Items and Sections. You can edit or delete the sections at any time by double clicking on the relevant Section, and changing the content.
|
| Tab |
Item |
Content shown on Contract if selected |
||
|---|---|---|---|---|
| Overview Tab |
Project Summary |
Table Displaying:
|
||
| Location Map |
The map image from Enquire showing location |
|||
| Project Notes |
Table displaying the list of comments left in project notes section of Enquire, as well as the date they were posted and who by. |
|||
| Team/Partners Tab |
Project Managers |
Table displaying the Project manager/s details:
|
||
| Partners/Collaboration Agreements |
||||
| Location Tab |
Additional Information |
Table displaying User Defined Fields with regards to project property |
||
| Alignment Tab |
Project Alignment |
Table displaying Aspirational Target, Resource Condition Target, Management Action Plan, Management Action and Relationship |
||
| Financials Tab |
Previous Projects & Funding |
|
||
| Project Funding Source/s |
Table displaying the list of funding sources, how much was funded during each period and the total amounts |
|||
| Payment Schedule from Tasks |
Table displays the title, amount and due date |
|||
| Project Cost |
Table displays:
|
|||
| Budget Breakdown |
Table displays each cost line and it's Budgeted and Actuals for each period, as well as the total budgeted and actuals |
|||
| Outputs Tab |
Orphaned Outputs |
Table displays:
|
||
| Current Outputs |
Tables displaying each current output (one per table). Displaying is:
|
|||
| Completed and Closed Milestones |
||||
| Tasks Tab |
Gantt Chart |
The Gantt chart built in Enquire |
|
|
| Project Task Actions |
A table displaying:
|
|||
| Contracts Tab |
Contract Parties |
Table listing:
|
||
| Feedback to the Implementer |
||||
| Contract Type |
Table displaying the confirmation of:
|
|||
| System Generated Contract History |
Table displaying the version number, date/time generated, who it was generated by and the contract file name (ending with .rtf) |
|||
| Special Contract Conditions |
Numerical listing of the stated special conditions within the contract |
|||
| Insurance |
Table displaying if insurance is in place, if there is then it also displays the type and what it is insured for |
|||
| Support Materials |
Risk Management |
|||
| Resource/ Experience/ Qualifications |
||||
| Communication Activities |
||||
| M & E Plan |
||||
| Project Future Maintenance |
||||
| Advice Sought |
||||
| Alerts Tab |
Scheduled Project Alerts |
Table displaying a list of the different message subjects, the date they were set for and the recipients of that alert |
||
| Attachments Tab |
Attachment List |
Table displaying:
|
||
| Legacy Contract |
Project Identifiers |
Table displaying the Project ID, Name, Description and Objectives / Outcomes |
||
| Contractor |
Table displaying:
|
|||
| Delivery Agent |
Table displaying:
|
|||
| Project Manager(s) Details |
The project manager(s) name above table that displays:
|
|||
| Start Date |
Start date (Format = 01/12/2010) |
|||
| Completion date |
Completion date (Format = 31/10/2011) |
|||
| Funds (Payment Milestones) |
Funds (GST Excluded) and $ amount |
|||
| Funds (Project Costs) |
Funds (GST Excluded) and $ amount |
|||
| Insurance |
||||
| Special Contract Conditions |
Table listing the different special contract conditions stated in agreement |
|||
| Outputs |
A table displaying:
|
Please note that whether the contract is being built for a Project or Project Application, the same content will be pulled from Enquire.
7. Select Save once you are happy with your contract template. This template will now be available for all (external) projects within your group to use when extracting contracts from Enquire.
8. Templates can be edited from the Project Contracts tab. Click on the arrow beside the Contract template name to Edit or Delete the template.
Click here for instructions on how to select, edit, and download the contract at a Project Level.
User Defined Components (UDCS) can be added to Contract t templates in the Sections area to add another level of customisation to your contracts. How Users Defined Components can be used for customisation will depend on your organisations requirements, you could include additional conditions to be signed off by relevant personal and contact information for suppliers and contractors. See our page on User Defined Components for more information about creating and managing them,
1. Select or create a Project Contract Template.
2. Navigate to the Sections area.Navigate to the Sections area. Locate the required User Defined Component on the left (under the Available Items area) and drag it into the folder on the right (under the Current Sections & Items area).

To remove a UDC from the template, select the down arrow next to its name and select Delete from the menu.
3. Select Save when you have completed creating or editing the Project Contract template.
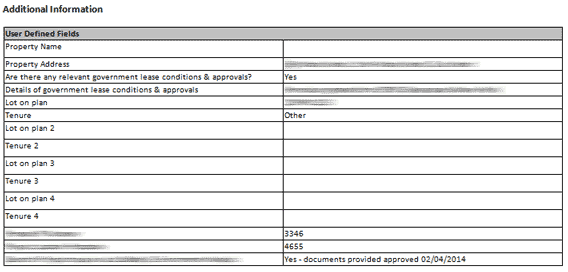
4. When the document is exported, the User Defined Component will be included. In this example, we have in-depth information about a project site.
1. Log into Enquire. Select My Group from the drop down menu next to the Home button

2. Select the Project Contract Tab.

3. Select the Alert icon for the relevant Contract step e.g Contract Type Saved.
2. Enter a message for the alert.
3. Enter the message to be sent. Use the drop down selections to insert automatic message data fields.
4. Select the roles to receive the alert.
5. You can create an alert and keep it inactive, or select Active to activate the alert.
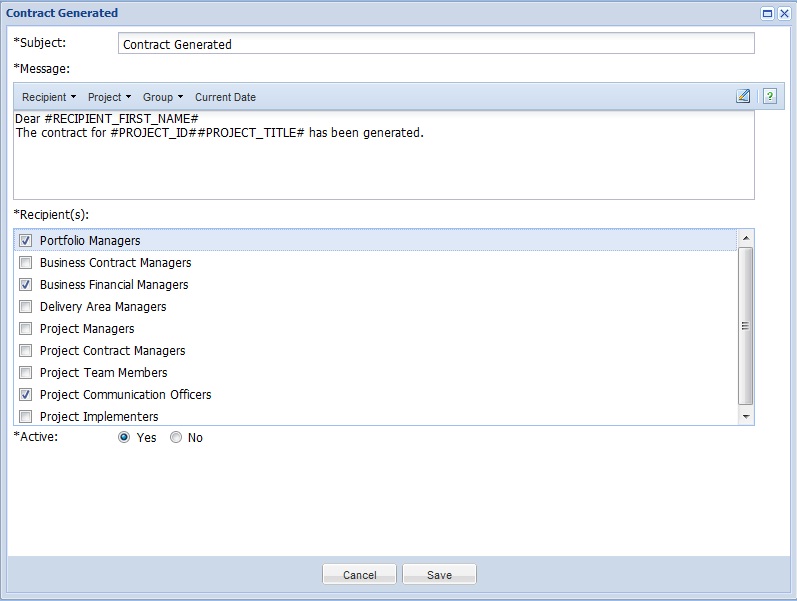
6. Select Save.