| SYS |
|
|
| SYS |
|
|
User Defined Fields and Components (UDFS and UDCS) are a project management tool that allows organisations to capture additional data outside of Enquire’s Smart Components. How User Defined Components can customise your projects and forms will depend on your organisation's requirements but they could include capturing in-depth information about a project site, assess an application and collect data about staff training outcomes.
UDFS can be grouped into User Defined Components (UDCS) to increase the flexibility of project data capture. User Defined Components and Fields are then available for use through the customisation of project templates, application and assessment forms, project exports and contracts, and CRM contract records.
1. Select My Group from the Home drop down menu.
2. Select the Component Builder tab.
3. Select the Create New Field button under the Fields section

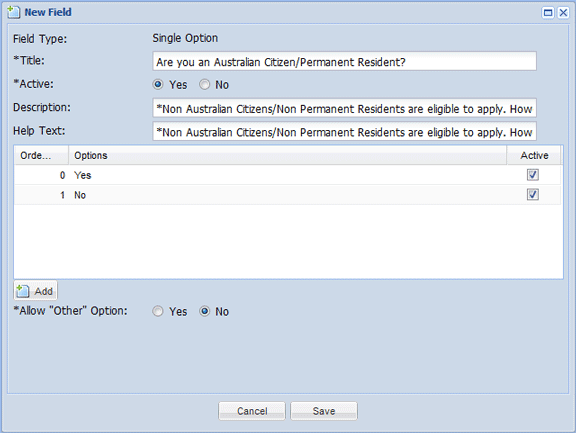
4. Enter the following mandatory and optional details:
| Field/Option | Description |
|
Field Type |
The type of User Defined Field you wish to create:
|
| Title |
The question to answer or information to enter. E.g. Age, Are you an Australian Citizen?
|
| Active | This indicates if a User Defined Field is available (Yes) to use within a User Defined Component or unavailable (No). |
| Description |
A description of the information you require staff or applicants to enter.
|
| Help Text |
Informative text to assist staff or applicants. E.g. Please enter your date of birth.
Some UDF types like Single Options will display the Help Text when the mouse is held over the available options.
|
| Options | Single and Multiple Option only. The list and order of options available for users and applicants to select from. |
| Allow "Other "Option |
Single and Multiple Option only. Select Yes to allow staff and applications to select Other as an option and then enter it in a text box.
|
5. Select Save to create the User Defined Field.

If you make changes to a UDF, all instances of the UDF will follow suit. For example if we changed the title of a UDF from "Property Address" to "Site Address", any User Defined Component that uses this UDF will now read "Site Address". Any items such as project exports and reports generated before the edit will not reflect the change.
1. Select My Group from the Home drop down menu.
2. Select the Component Builder tab.
3. Select the arrow next to the relevant UDF's , and then select Edit from the menu.

4. Make the necessary changes and select Save to retain your changes.
Note: You can't change the Field Type of a UDF when editing. Instead a new UDF will need to be created and the old one deleted.
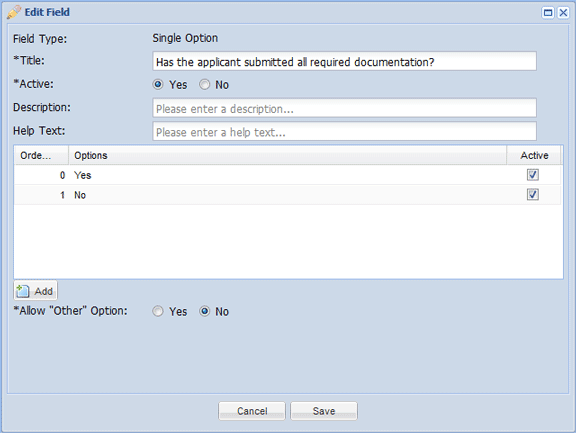
The UDF has now been edited.

1. Select edit.

2. To add an extra child to a user defined field click on the contextual menu icon of the Parent UDF and select Add Child.
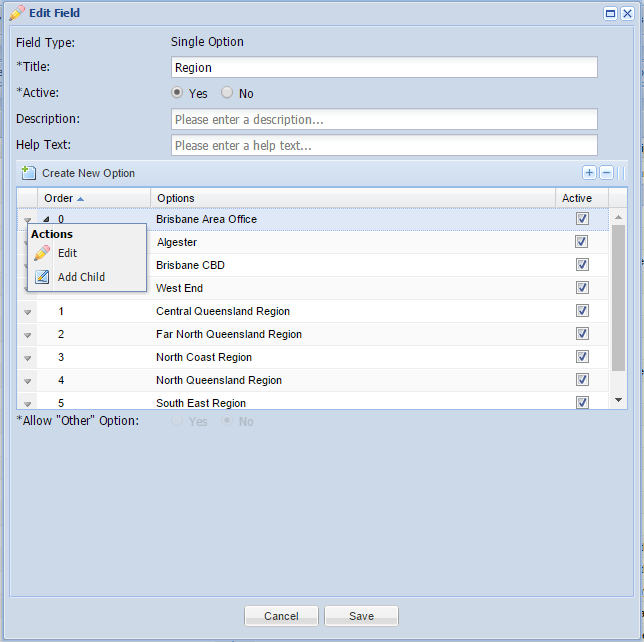
3. In this example to order South Brisbane in between Brisbane CBD and West End select Order number 2 (West End's number).This will ensure your list is alphabetised correctly.
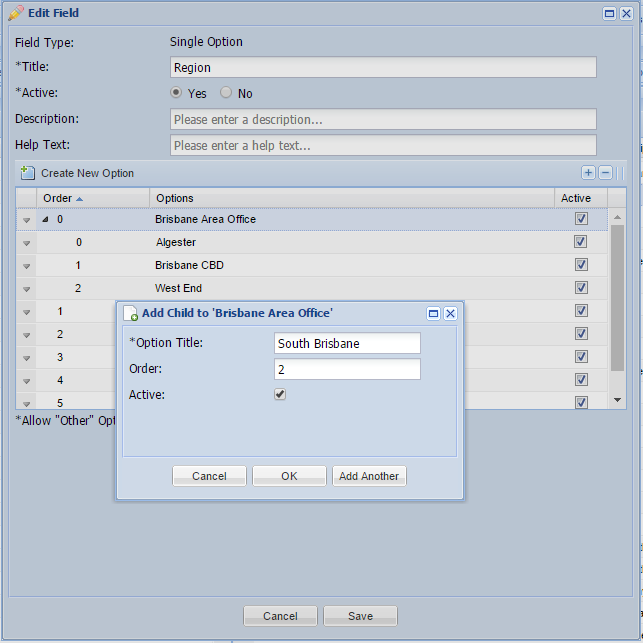
4. Single option list is in order.

A UDF can't be deleted if it is part of a User Defined Component AND has been filled with data at a project level. You will be prompted if the UDF can't be deleted.
1. Select My Group from the Home drop down menu.
2. Select the Component Builder tab.
3. Select the arrow next to the relevant UDF's, and select Delete from the menu.

4. Select Yes when prompted.
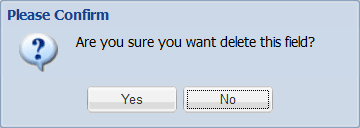
The User Defined Field has been deleted.

User Defined Components (UDCS) are groups of related User Defined Fields that are used to collect related pieces of information such as statistical information about applicants or details about a location's ecosystem.

1. Select My Group from the Home drop down menu.
2. Select the Component Builder tab.
3. Select Create New Component button in the Components panel.

4. Enter the following details:

| Field/Option | Description |
| Title | The User Defined Component’s title, this can be used to assist staff and applicants’ understanding of the information collected by the UDC. |
| Location | Select the UDC’s location within the project record or CRM record. |
| Contact Types | Select the types of contacts that the UDC is available to. This option is only available when the UDC's Location is "Contacts - Additional Information Tab". |
| Active | This indicates if the UDC is available (Yes) or unavailable (No) for use by staff and applicants. |
5. Add User Defined Fields to the component by following the instructions below:
6. Select the Add button and then select the relevant UDF from the list.

7. Once added, it can be modified using the panel on the right. The editing options may vary depending on the UDF type. For example, a Text type has character limits while a Date type can have a To and From dates.
8. Select the UDF and drag it above or below the relevant fields.

9. Select the down arrow next to the relevant UDF and then select Remove from the menu.

A UDF can't be removed from a component, if data has been collected within it.
10. Continue to add user defined fields as required. Select Save when you have completed the User Defined Component.

1. Select My Group in the drop down menu under the Home.
2. Select the Component Builder tab.
3. Select the arrow next to the relevant UDC's and select Edit from the menu.

4. Make the relevant changes to the User Defined Component and then select Save.
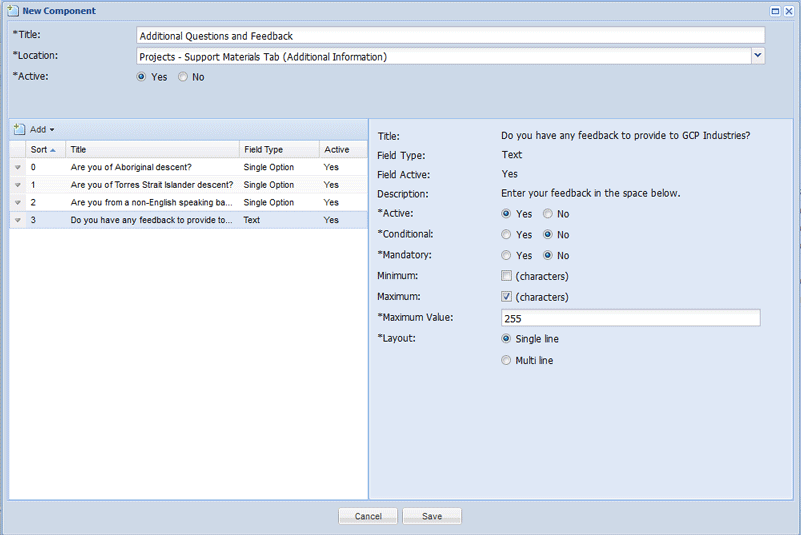
The User Defined Component has now been edited with your changes.
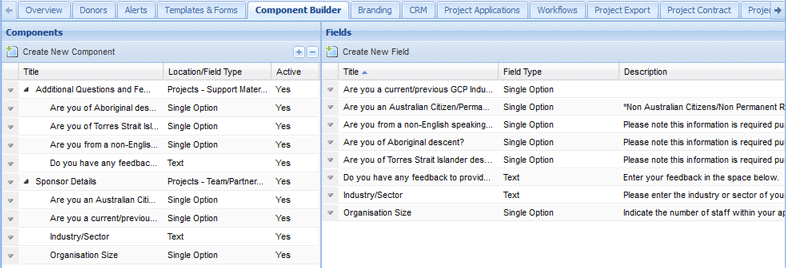
User Defined Components can't be deleted if they are in use a project template AND have information recorded within them. You will be prompted if you are unable to delete a User Defined Component.
1. Select My Group in the drop down menu under the Home button.
2. Select the Component Builder tab.
3. Select the arrow next to the relevant UDC's and select Edit from the menu.

4. Select Yes when prompted.
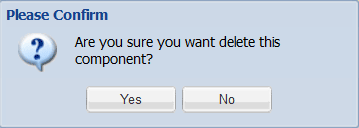
The User Defined Component will now be deleted.

User Defined Component can be hidden from users by making them inactive.

Single Option type User Defined Fields can be configured within a UDC to score against assessment indicators. In this example, a UDF is used to assess an organisation's ability to deliver a project. Each option within the UDF scores against the indictor "Ability to Deliver". Additional UDFS within this component or others will produce a total score towards the indictor. The scores will be culminated and tracked on an application's or project's Assessment tab.
1. Create or edit a User Defined Component.
2. Add a Single-Option User Defined Field to the UDC.
3. Select the relevant indicator from the Assessment Indicator drop down menu.
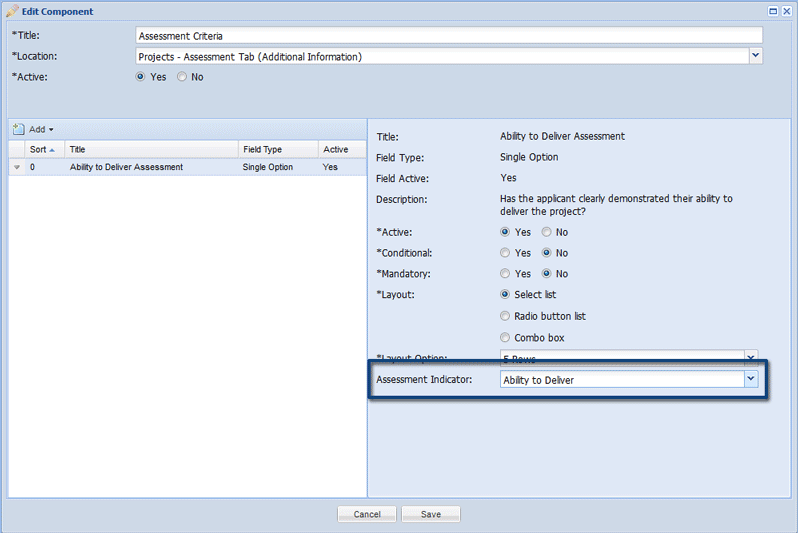
4. Click on an area outside the drop down menu. You can now set the scores for the active options in the UDF against the selected Assessment Indicator. In this example, we have several options that can be configured to score against the Ability to Deliver indicator.

5. Enter in the scores next to the relevant options.

6. Select either Yes or No to include the selected answer in the rationale. The rationale is included on the project and round's Assessment tabs and is used to explain how an application scored against an indicator. In this example, an application scored poorly against the Ability to Delivery and Eligibility assessment indicators.
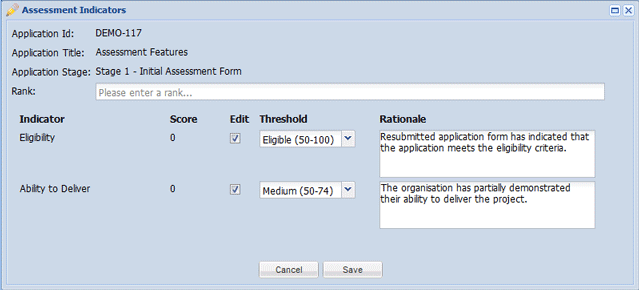
7. Continue to edit User Defined Component and then select Save.
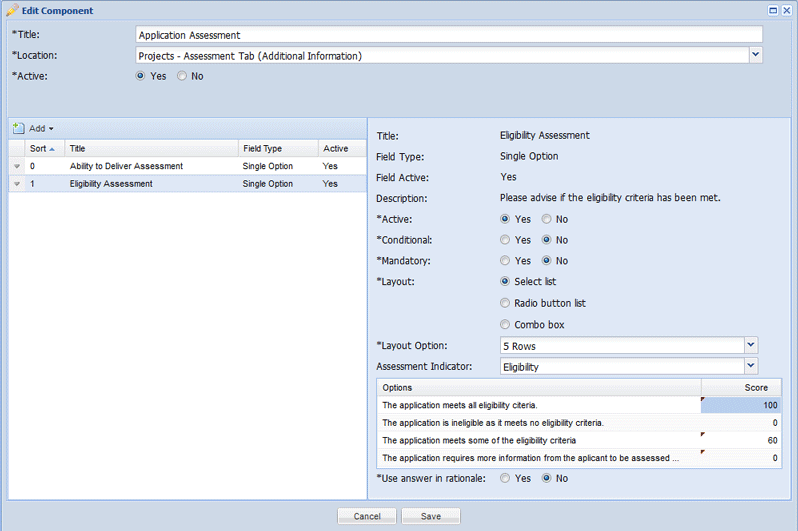
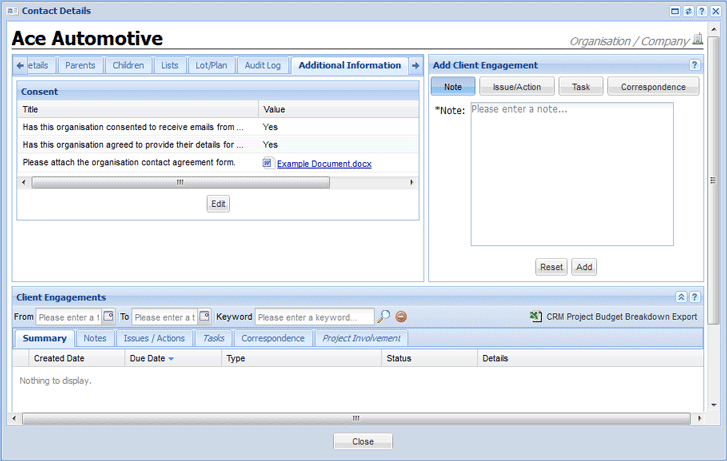
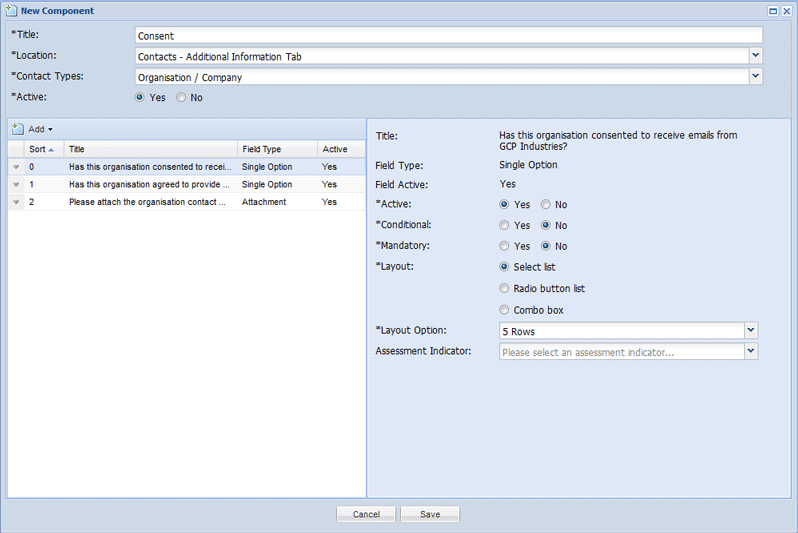
User Defined Components can be added to the Additional Information tab of a CRM Contact Record to allow for extra data to be captured. UDCS can be customised so they are applicable to specific user groups. In this example, we are creating a UDC for contacts that fall under the type of "Organisation/Company". This UDC will be used to check if an organisation has consented to be contacted to receive additional communication from another organisation.
1. Select My Group from the drop down menu under the Home button.
2. Select the Component Builder tab.
3. Create or edit a User Defined Component.
4. Select Contacts - Additional Information Tab from the Location drop down menu.
5. Select the type of contacts the UDC will be used within from the Contact Types drop down menu.

6. Add and edit the User Defined Fields that you wish to add to the component
7. Select Save when you have finished creating or editing the User Defined Component.
The UDC will be found under the Additional Information tab of CRM contact records.
