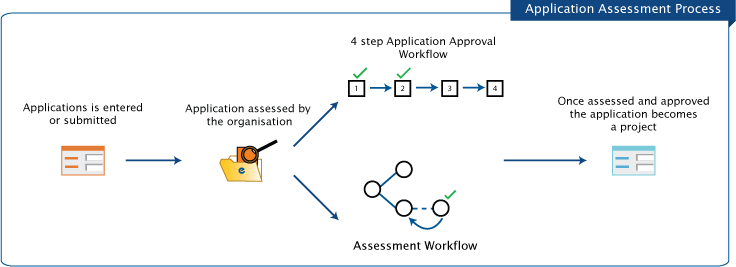
Applications can be entered into Enquire by staff or through the Applicant Portal, it will need to be assessed through the 4 Step Application Approval Workflow or a Workflow before it becomes an active Project.
There are several methods to enter your applications into Enquire:
1. Single Page Create - Manual entry by internal staff.
2. Bulk Upload of multiple applications- Internal staff can download an Excel spreadsheet template from Enquire, complete the mandatory components, then upload the spreadsheet into Enquire. The application will be generated with the information from the spreadsheet. Note: Only a minimal level of data is included within the Bulk Upload functionality.
3. Applicant Portal - External applicants submit applications for grant funding through your organisation's Applicant Portal.
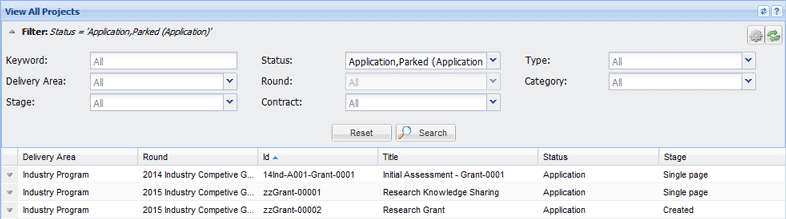
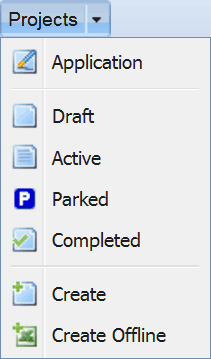
To see all applications or to search for a specific application, select Applications from the Projects drop down menu on the primary navigation to go to the Project Search page.
| PJA | RDM* | DAM* | PFM | BCM | BFM |
|
|
|
|
|
|
|
*Create applications within their Rounds and Delivery Areas only
1. Select Create from the Projects drop down menu on the primary navigation.
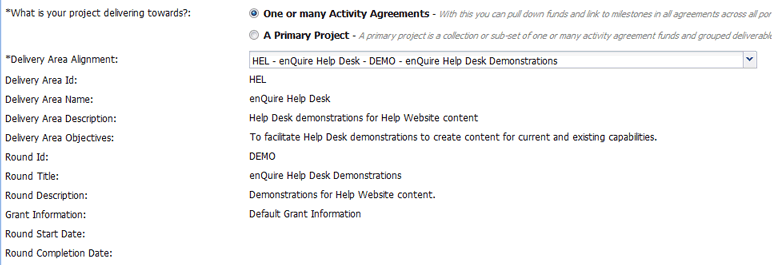
2. Select the Project Application radio button.

3. Select if the project application is delivering towards an Activity Agreement or a Primary Project. Most projects will deliver towards One or Many Activity Agreements. Selecting a Primary Project will limit this project to only link to information with the Primary Project's sub-set.

4. If the application intends to deliver towards an Activity Agreement, select the relevant Delivery Area and Round that it will align with. If the application will deliver towards a Primary Project, select the relevant Primary Project from the drop down menu.
5. Select if the application will be completed internally or externally. You will also need to enter mandatory information such as the Project Name, Start and Completion dates.
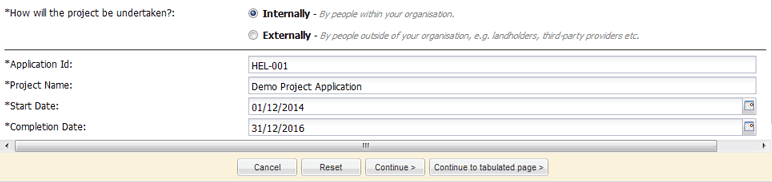
If you are creating the application internally or wish to skip the application form, select the Continue to tabulated page button.
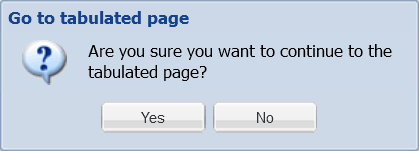
6. Select Yes when prompted.
The information you will need to enter will depend on the application form assigned to the Round.
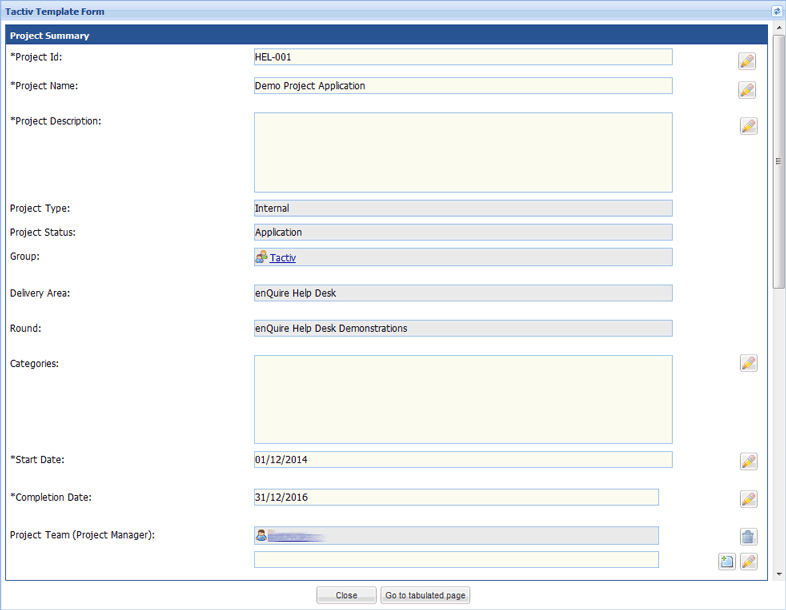
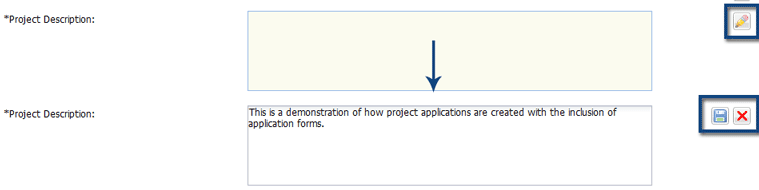
To add or edit the form's information, select the pencil icon next to the relevant field. Select the Save icon to keep your changes or select the X icon to exit without saving.
If you wish to complete the application form at a later date, select the Close button to return to the View All Project Applications table. Select the Go to tabulated page button to process the application internally.
Select Yes when prompted.
You will be taken the Overview tab of the application and can continue entering the application details. The application will need to be assessed in accordance to your organisation's 4-step application approval workflow or through a custom Workflow.
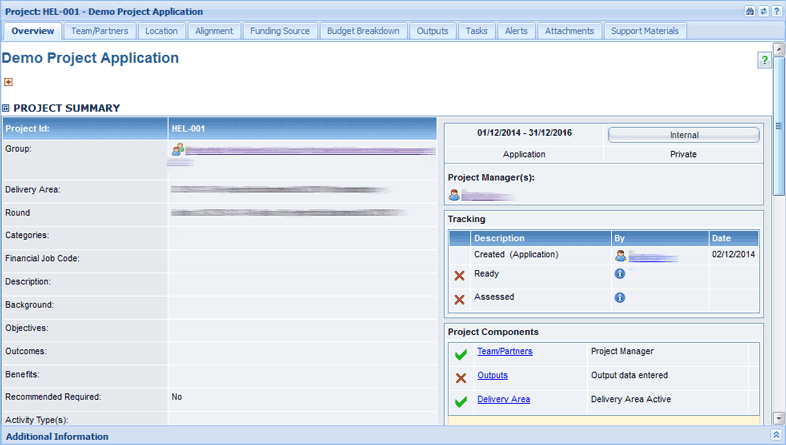
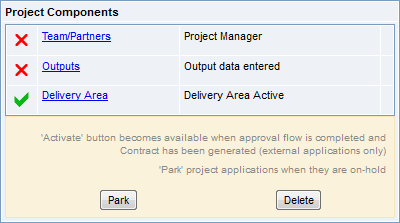
7. Mandatory data is required before the application can be assessed and activated:
8. Once all the mandatory data is entered, the application can be assessed by the relevant authorities through a 4-step application approval workflow or custom Workflow.
An application's current Approval Workflow status is displayed in the Tracking table on the Overview tab. This will be updated by the authorised users after they have reviewed the application.The Tracking table will display the name of the user who updated the approval step and the date this occurred.
![]()
1. Open the relevant application.
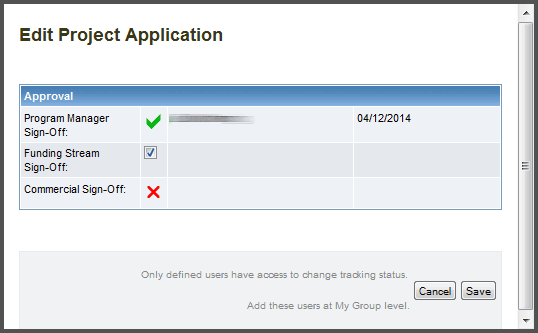
2. Select the Update button under the Tracking table to update the application's progress.
![]()
3. Select the checkbox for the relevant stage you are approving, and then select Save to confirm your decision.
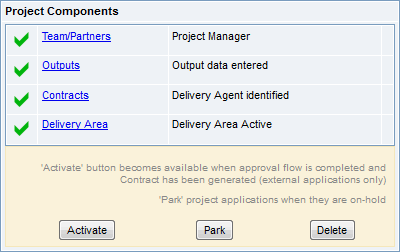
The application can become an active Project once the final approval step has been completed.
4. Select the Activate button under the Project Summary table to make the application a Project.
Once an application has the mandatory information entered, you can export update the Application Approval Worfklow step via the Project Search page
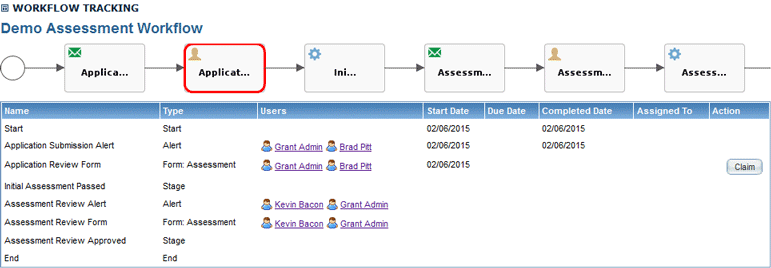
1. Open the relevant application and scroll down to the Workflow Tracking section.
As multiple users can be allocated a workflow step or task, a step must be claimed before it can be updated. This prevents multiple users from updating the same form simultaneously.
2. Select the Claim button to claim the workflow step.
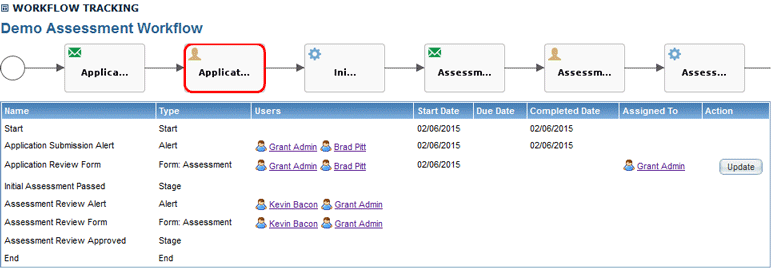
3. Select the Update button to update the step.
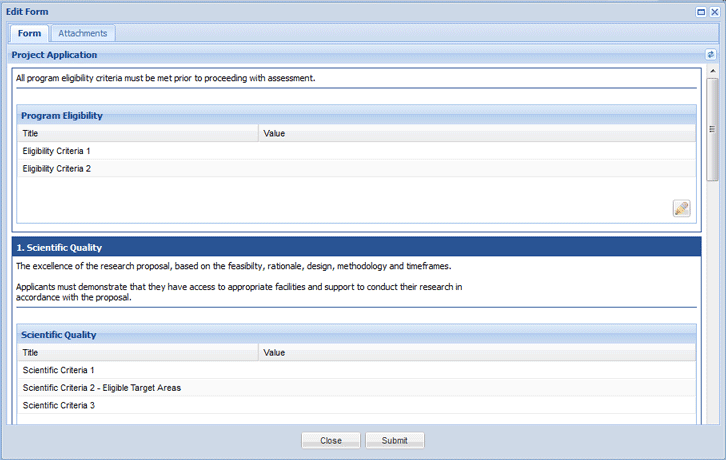
You will now be required to fill in an assessment form for the current stage. The attachments tab will allow you to download any attachments that will assist with your assessment.
4. Select Submit when you have completed the form.
The step will automatically be updated with the completion date and user who completed the step. In this example, Grant Admin completed the "Application Review Form" step which has updated the application to be in the Initial Assessment Form stage.
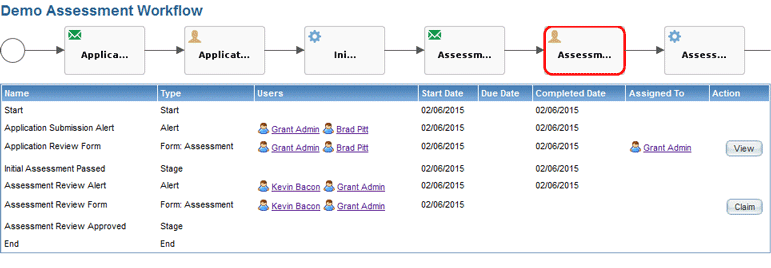
You may have the option to select the Skip button if you want to skip the current step and proceed to the next one.
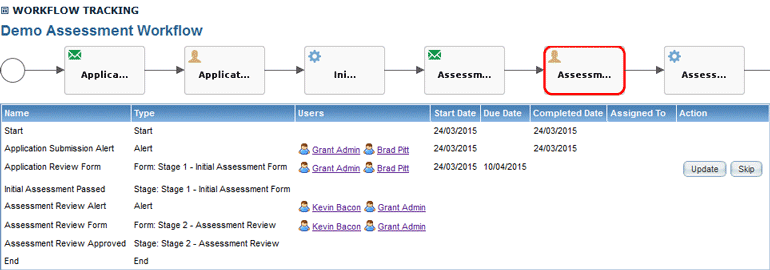
As the application is assessed, it's current Workflow stage will be reflected in the project's Overview tab.
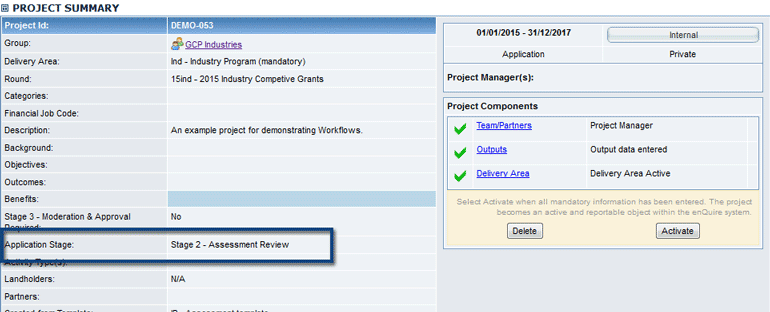
When all the Workflow steps have been completed, the application can be activated as a project. Assessment forms can be reviewed with the View button. Assessment results linked to assessment indicators can be tracked on the Assessment tab.

6. Select the Activate button under the Project Summary table to make the application a Project.
| PTM | PM | PJA | RDM* | DAM* | PFM | BCM | BFM |
|
|
|
|
|
|
|
|
|
*Can access uploaded applications within in their Rounds and Delivery Areas only
1. Select Create Offline from the Projects drop down menu on the primary navigation.
2. Ensure you are on the Bulk-Upload Application tab. Download the template excel spreadsheet to populate data.

The template spreadsheet is pre-populated with the latest data such as Delivery Areas and Project Managers, so it is important to use a newly downloaded version of this document.
3. Enter mandatory fields in the spreadsheet and any additional data.
Rules for data entry include:
4. Save the Excel spreadsheet. Note: For best results save the spreadsheet as an .xls file (Excel 97-2003 Workbook).
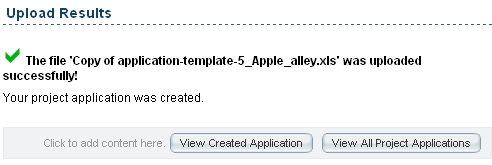
5. Upload the Excel spreadsheet by clicking on 'Browse'. Here you can navigate to the location of the saved spreadsheet. It will take a few moments to upload the document.
6. Any errors are displayed on screen with details of fields needing amendment. When uploaded successfully the following message will display.
|
Select the View All Project Applications button to see details of project applications and to add more information to them.
7. The bulk upload applications will appear as per the Single Page stage. See the Single Page Create section for further information.
| PJA | RDM* | DAM* |
PFM |
BCM |
BFM |
|
|
|
|
|
|
|
Can access uploaded applications within in their Rounds and Delivery Areas only
FBA users can create project applications using off-line template that can be downloaded and filled-in by a field officer and then uploaded in Enquire creating a new project application record.
1. Select Create Offline from the Projects drop down menu on the primary navigation.
2. Navigate to the Offline Application tab.

3. Download the template Excel spreadsheet to populate data. The template spreadsheet is pre-populated with the latest data such as Delivery Areas and Project Managers, so it is important to use a newly downloaded version of this document.

4. Enter mandatory fields in spreadsheet which are indicated by their grey shading. When you add any additional data following the rules of data entry.
Rules for data entry:
• Grey fields indicate mandatory data required
• Pre-select information from drop down lists
• Avoid deleting data in cells as this may delete important formulas
• Project title and id must be unique
• Save the spreadsheet in your local driver using a meaningful name. For best results, save the spreadsheet as an .xls file (Excel 97-2003 Workbook).
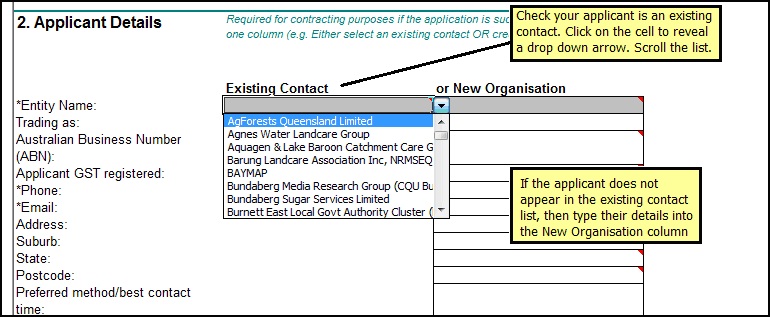
Hover your mouse over the cell to display some help comments.

|
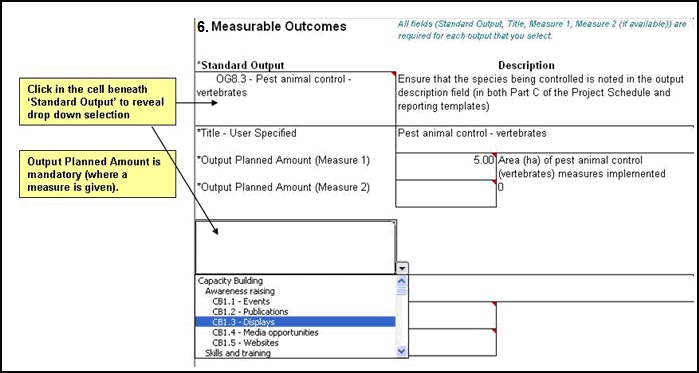
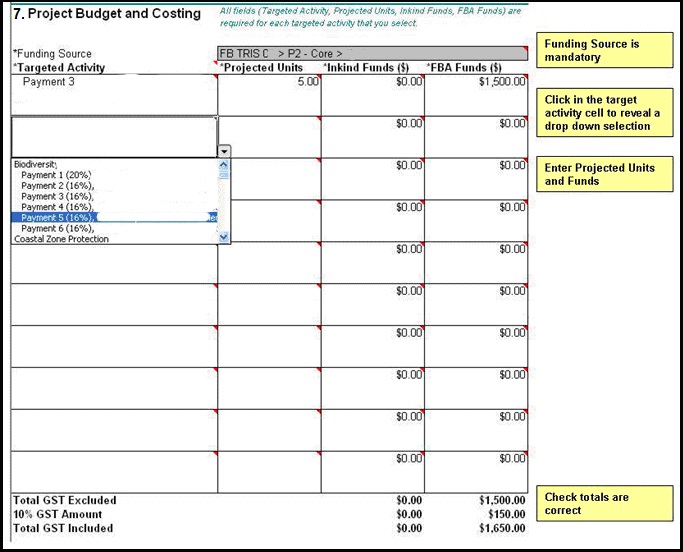
An example template is provided below with some additional instructions.
|
 |
 |
|
5. Save the template on your local driver with a meaningful name. For best results, save the spreadsheet as an .xls file (Excel 97-2003 Workbook).
6. Select Create Offline from the Projects drop down menu on the primary navigation.
7. Navigate to the Offline Application tab.
8. Upload the Excel spreadsheet by clicking on Browse. Here you can navigate to the location of the saved spreadsheet. It will take a few moments to upload the document. Any errors are displayed on screen with details of fields needed amendment. When uploaded successfully the following message will display.
|
Override Function
An Offline Application Excel template with the same Project Id and Name may override an existing Project Application if all Mandatory information (ie., Project Manager, Delivery Agent, Outputs & Funding Source) has not been entered. Single fields will be overridden with new template data. Multiple entry fields will contain any pre-existing data as well as new data from the most recent template upload.
9. Select the View All Project Applications or View Created Application buttons to see details of the applications entered and enter more information. View the uploaded Excel Spreadsheet on Attachments tab.
10. Double click on the Project title and navigate to the Outputs tab. This will display your Orphaned Outputs which you need to Link to an Activity Agreement Milestone.
As per other applications, business process apply including for exporting the application (off-line technical assessment and Board review) or contract generation.
| PJA |
RDM* | DAM* |
PFM |
BCM |
BFM |
|
|
|
|
|
|
|
*Can access uploaded applications within in their Rounds and Delivery Areas only
BMRG users can create project applications using the off-line templates that can be downloaded and filled-in by a field officer and then uploaded in Enquire creating a new project application record.
1. Select Create Offline from the Projects drop down menu on the primary navigation.
2. Navigate to the Offline Application tab.
3. Download the template excel spreadsheets to populate data. The template spreadsheet is pre-populated with the latest data such as Delivery Areas and Project Managers, so it is important to use a newly downloaded version of this document.
Note: Avoid deleting information in template cells as this may delete important formulas.
4. Enter mandatory fields in spreadsheet which are indicated by their grey shading. When you add any additional data follow the rules of data entry.
Rules for data entry:
• Grey fields indicate mandatory data required
• Pre-select information from drop down lists
• Avoid deleting data in cells as this may delete formulas
• Project title and Id must be unique
• Save the spreadsheet in your local driver using a meaningful name. For best results, save the spreadsheet as an .xls file (Excel 97-2003 Workbook).
Hover your mouse of the cell to display some help comments.

An example template is provided below with some additional instructions: 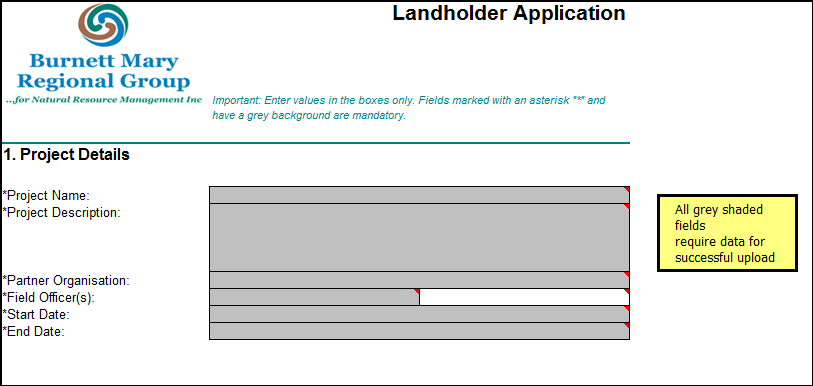
5. Save the template on your local drive with a meaningful name. For best results, save the spreadsheet as an .xls file (Excel 97-2003 Workbook).
6. Select Create Offline from the Projects drop down menu on the primary navigation.
7. Navigate to the Offline Application Tab
8. Upload the Excel spreadsheet by clicking on Browse. Here you can navigate to the location of the saved spreadsheet. It will take a few moments to upload the document. Any errors are displayed on screen with details of fields needed amendment. When uploaded successfully the following message will display.
|
|
Override Function
An Offline Application excel template with the same Project id and Name may override an existing Project Application if all Mandatory information (ie., Project Manager, Delivery Agent, Outputs & Funding Source) has not been entered. Single fields will be overridden with new template data. Multiple entry fields will contain any pre-existing data as well as new data from the most recent template upload.
9. Select the View All Project Applications or View Created Application buttons to see details of the applications entered and to add more information to them. View the Upload Excel Spreadsheet on Attachments tab.
10. Double click on the Project title and navigate to the Outputs tab. This will display your Orphaned Outputs which you need to Link to a Milestone in an Activity Agreement.
As per other applications, business process apply including for exporting the application (off-line technical assessment and Board review) or contract generation.
DCQ users can export all Application EOI's along with their accompanying attachments, to a zip file.
1. Select Applications from under the Project drop down menu in the Primary navigation.
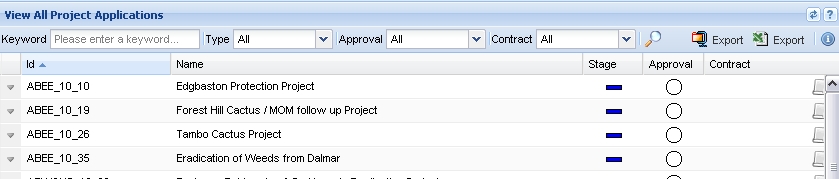
|
2. Select the Export button from the right hand side of the screen.

|
3. You will be prompted with instructions to right click to Save Link as.
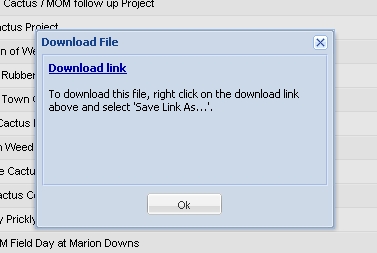
|
4. This will allow you to save your zip file to a local location on your computer.
5. The zip file is organised as a folder per application.

|