Enquire CRM allows for the creation of contact lists which can be used to streamline and track communications with list members. Any user can create a new contact list, however the list is accessible by all users in that group.
Members of the list can be assigned issues, actions and correspondence, which will appear in the contact list and their individual CRM record. Contact lists also have attachment and export features.
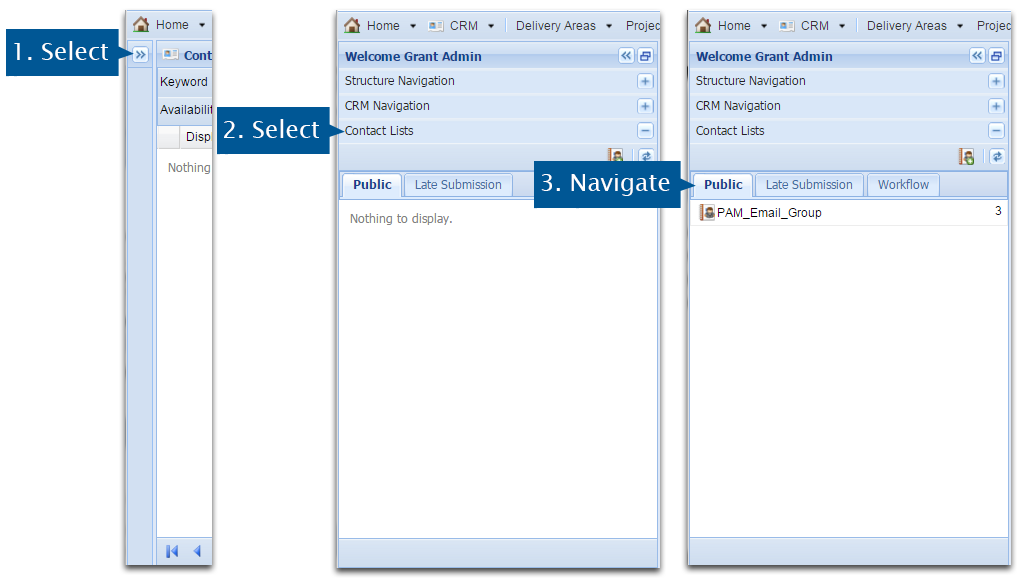
1. Select the menu arrow to open the Left Hand navigation panel.
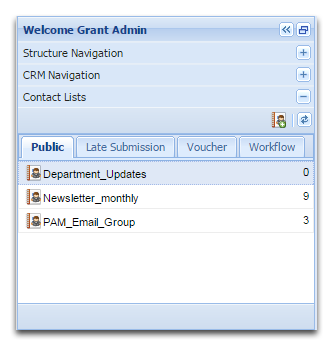
2. Select Contact Lists from the left hand navigation panel. Existing contact lists will be displayed here if they have been created by yourself or other users.
3. Find contact lists by selecting the type of list you are looking for.

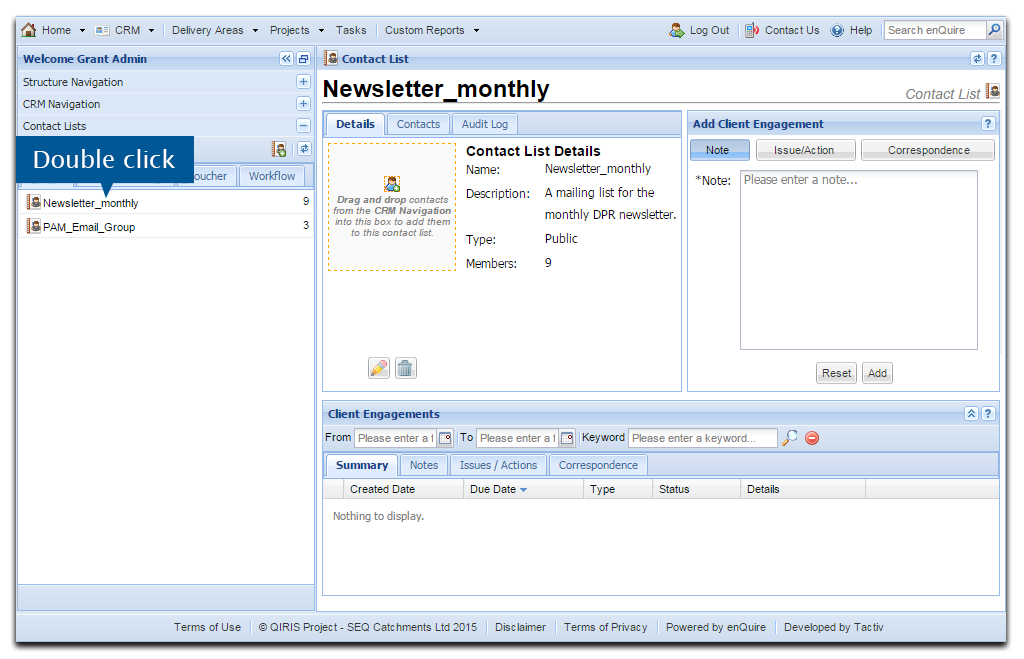
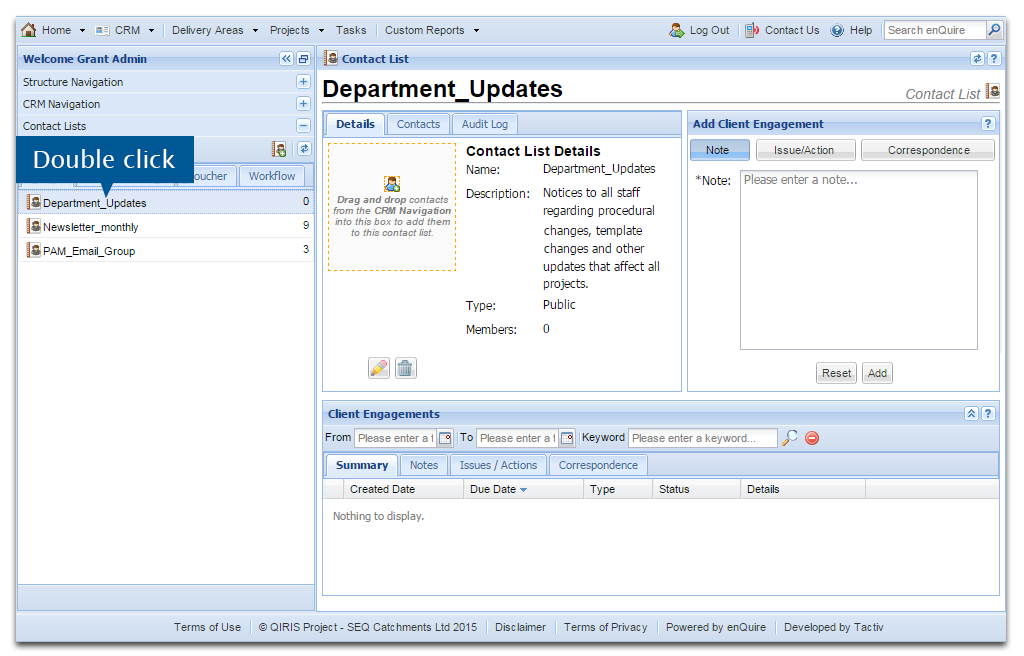
2. Double click on the list's name to open the Contact List.
Contact List naming rules:
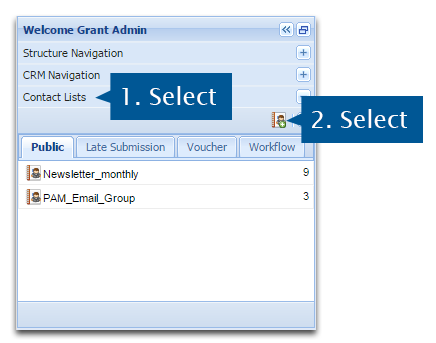
1. Select Contact Lists under left hand navigation. Existing contact lists will also be listed here.
2. Select Create New List icon.
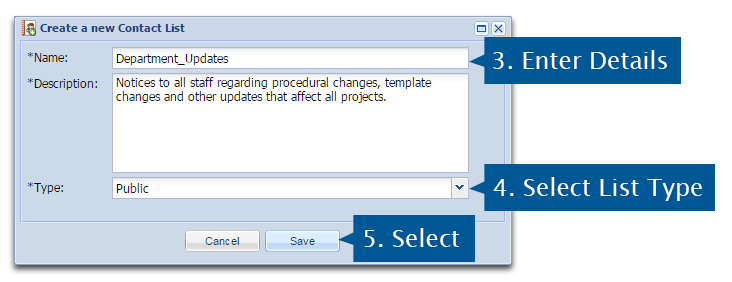
3. Enter the contact list name and description.
4. Select a List Type from the menu.
5. Select Save to create the list.
Your contact list has been added.
1. Open the contact list you wish to add members to. It will display on the right hand side of the screen.
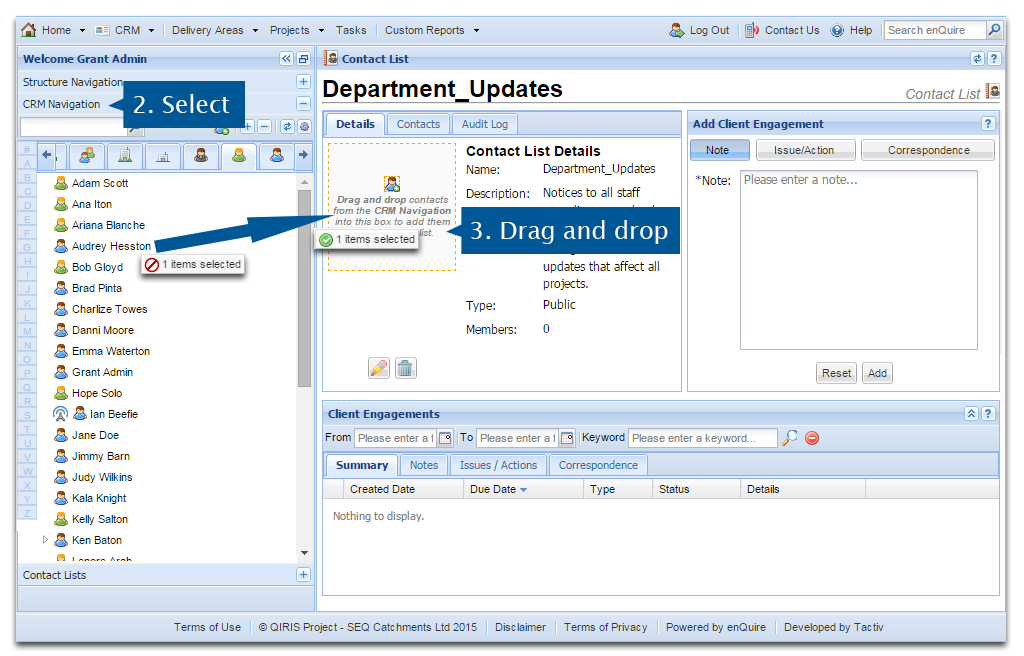
2. Select CRM Navigation in the left hand navigation to reveal all contacts. A contact list member can be any CRM contact type, e.g. individuals, organisations, officers or sole traders.
3. From the CRM Navigation, drag the contact that you wish to add, over to the "drag and drop box" in the contact list.
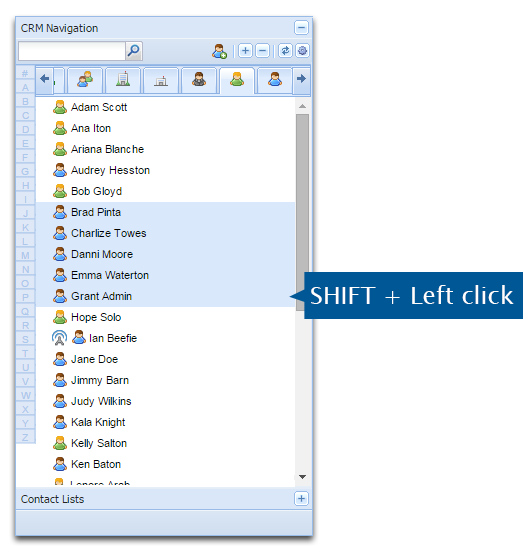
Hold Shift to select multiple contacts that are listed consecutively in the CRM Navigation.
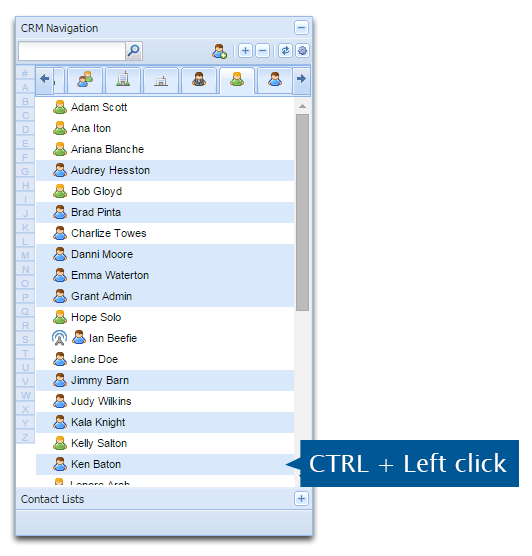
To select multiple contacts that aren't near each other, hold down Control as you select the contacts. For example, we want to add only specific users.
4. Continue adding contact lists members as required.
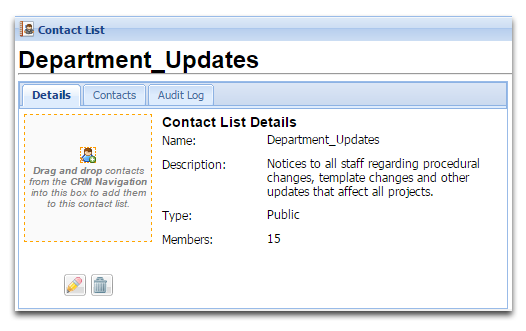
The total number of members will be displayed in the Details tab of the contact list.
Note: Enquire may take some time add new members to the list. Please be patient while this is happening.
Contact list members can be reviewed by selecting the Contacts tab.
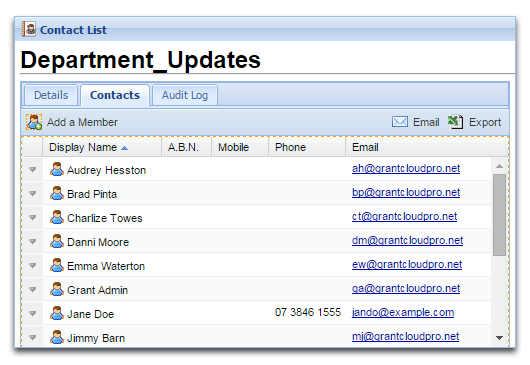
1. Open the relevant contact list and then select the Contacts tab.
2. Select the down arrow next to the member that you wish to remove.
3. Select Remove from the menu.
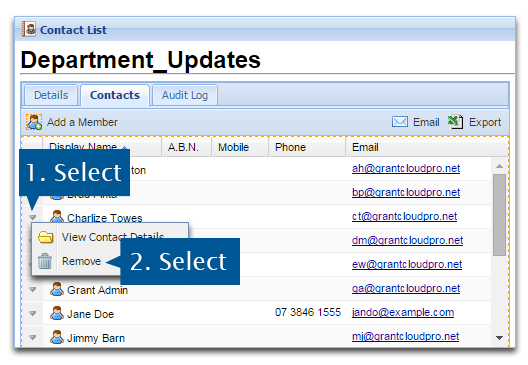
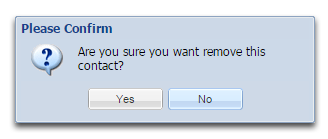
4. Confirm the deletion by selecting Yes when prompted. The contact will be deleted from the contact list.
Contact list members can be added to a list from CRM contact records.
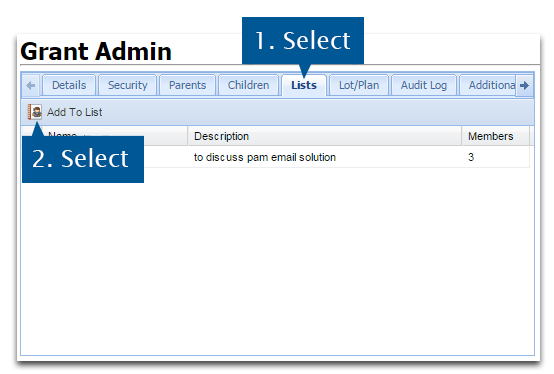
1. Open the relevant CRM contact.
2. Select the Lists tab. Any contact lists that has this contact as a member will be displayed in this tab.
3. Select the Add to List button.
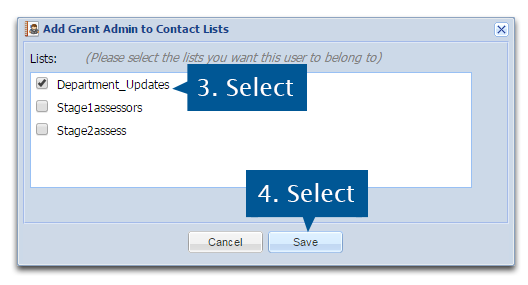
4. Select the contact lists you wish to add the contact to.
5. Select Save when you are done.
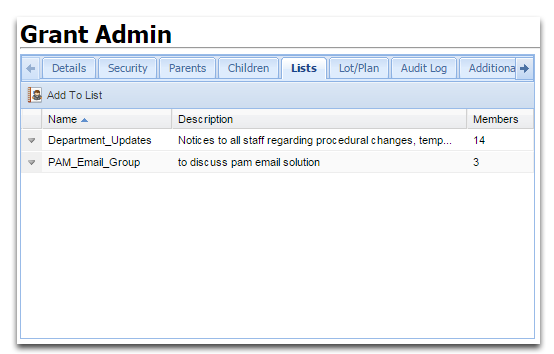
The contact will become a member of the selected lists, and the lists will be added to the Lists tab.
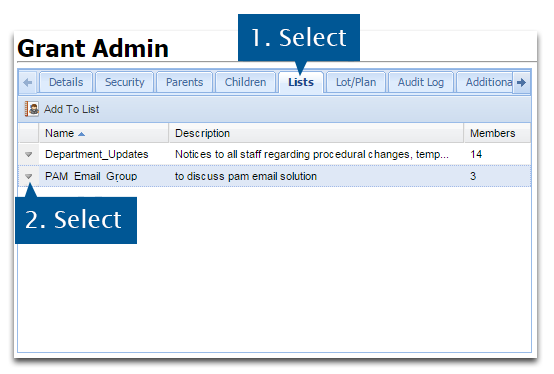
1. Open the relevant CRM contact.
2. Select the Lists tab. Any contact lists that has this contact as a member will be displayed in this tab.
3. Select the menu arrow next to the contact list you wish to remove the contact from.
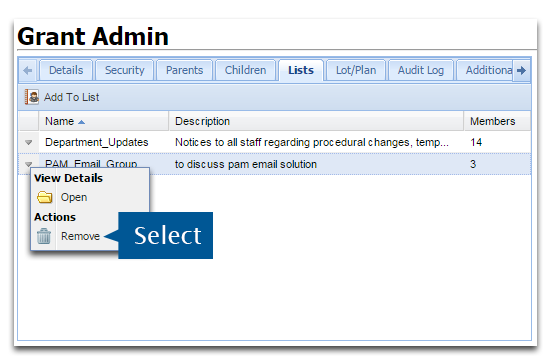
4. Select Remove from the menu.
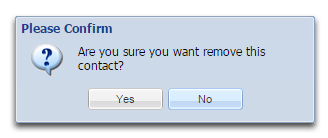
5. Select Yes when prompted to delete the contact.
| GAD |
|
|
Only the Group Admin can edit or delete contact lists.
1. Open the relevant contact list.
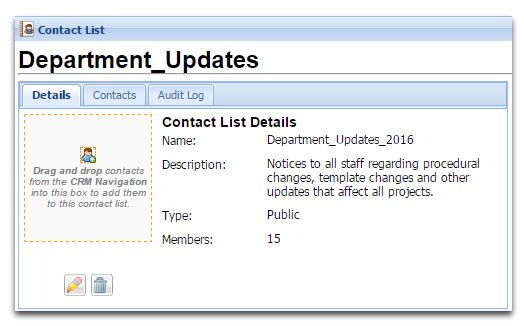
2. Select the pencil icon to edit the list's details or select the bin icon to delete the list.
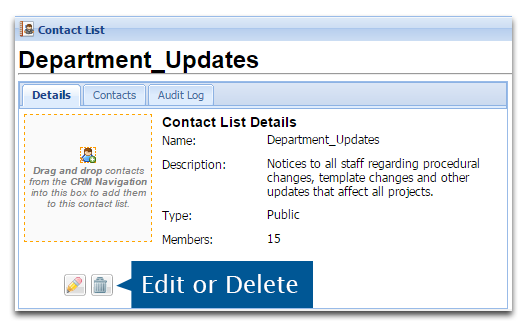
3. If editing, make the relevant changes.
4. Select Save to update the list's details.
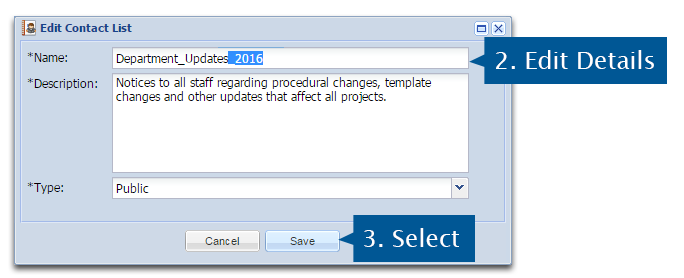
The contact list will be updated with the changes.
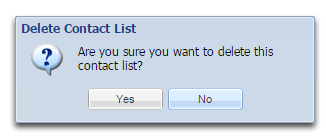
5. If deleting, select Yes when prompted.
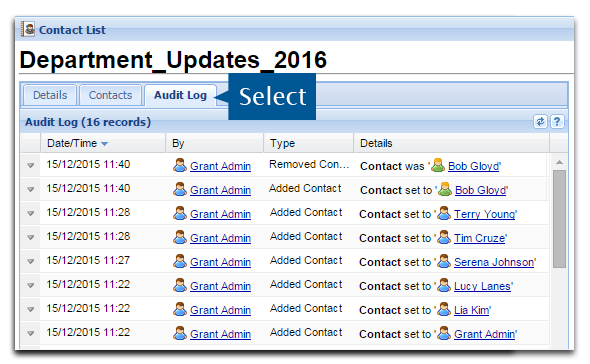
Changes to Enquire CRM Contact Lists are fully tracked in the Audit Log. Whenever you add, delete or make changes to a contact list, the log of those changes can be reviewed. Entries to the Audit Log cannot be deleted.
1. Open the relevant contact list.
2. Select the Audit Log tab.
Contact list engagement refers to the notes, issues, actions and correspondence items which are connected to a contact list. Please refer to our page on Client Engagement for more information on these items.

1. The Summary tab lists all the times (notes, issues, actions and correspondence).
2. Notes are an internal message that only applies at the contact list level. The Notes tab will display all the notes that have been sent to the list's members.
3. The Issues/Actions tab displays all issues and actions that have been assigned to specific or all list members. Assigned issues and actions will carry over to the members' CRM record.
4. The Correspondencetab displays all the correspondence and attachments that has been assigned to specific or all list members. These will carry over to the members' CRM record.
1. Open the relevant contact list.
2. Select Note in the Add Client Engagement section.
3. Enter the necessary details.
4. Select the Add button to create the note.
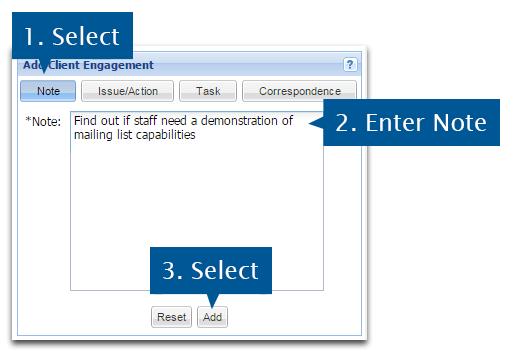
The note will now be added to the Notes tab in the Client Engagements section of the contact list.

Issues and actions can be added to a contact list and assigned to either specific or all contact list members.Issue and action categories need to be set up by your Group Admin before these can be assigned.
1. Open the relevant contact list.
2. In the Add Client Engagement section, select Issue/Action.
3. Select the Type.
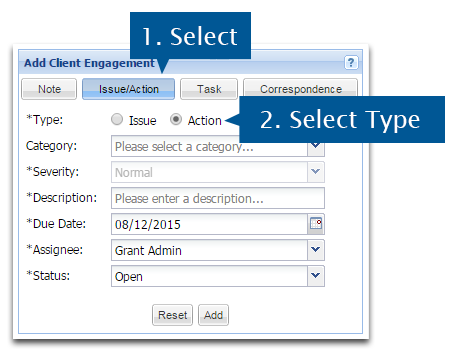
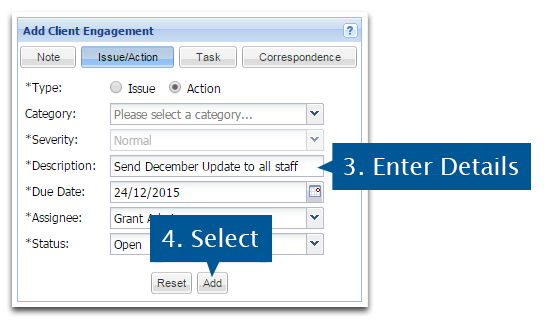
4. Enter the mandatory details. Your name will be the default assignee option.
5. Select Add to add the issues or action to the contact list.
6. Select the list members that the issue or action applies to.
7. Press Select to complete.
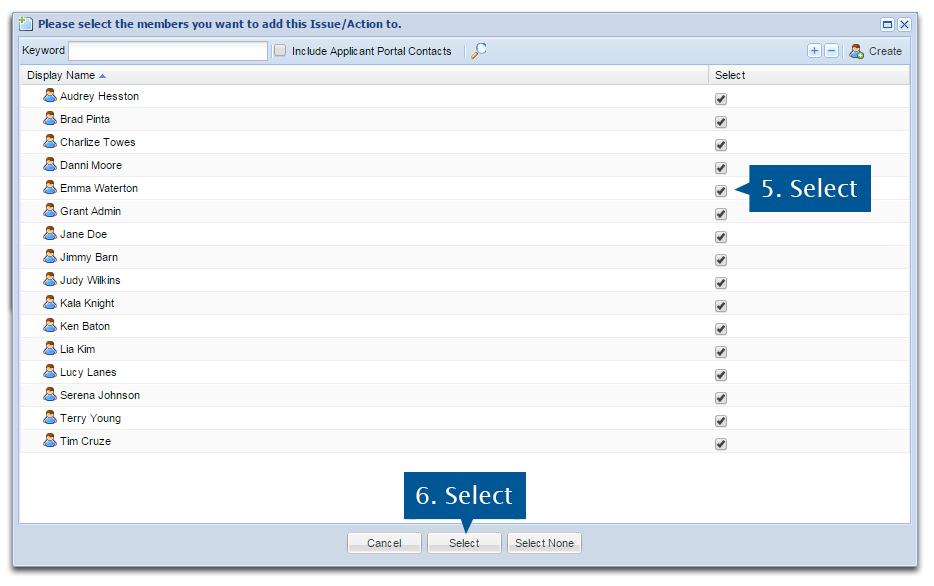
The issue or action will now be added to the Issues/Actions tab in the Client Engagements section of the contact list. It will also carry over to the selected members' CRM record in the Client Engagements section.

1. Open the relevant contact list.
2. In the Add Client Engagement section, select Correspondence.
3. Select the Type of Correspondence.
4. Enter the mandatory details.
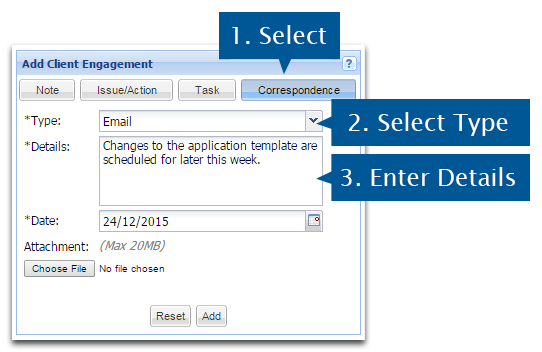
5. To add attachments, select the Browse button and locate the file on your computer. To remove the attachment, select the x icon next to the attachment's name.
6. Select Add to create the correspondence.

7. Select the members that this correspondence applies to.
8. Press Select to add the correspondence to the contact list and the CRM records of the selected members.

The correspondence entry will be displayed on the Correspondence tab in the Client Engagements section of the contact list.

Hover the mouse over the information icon in the members column to review the members included in the correspondence.

The correspondence will also be included in the selected list members' CRM records under the Correspondence tab in the Client Engagements section.
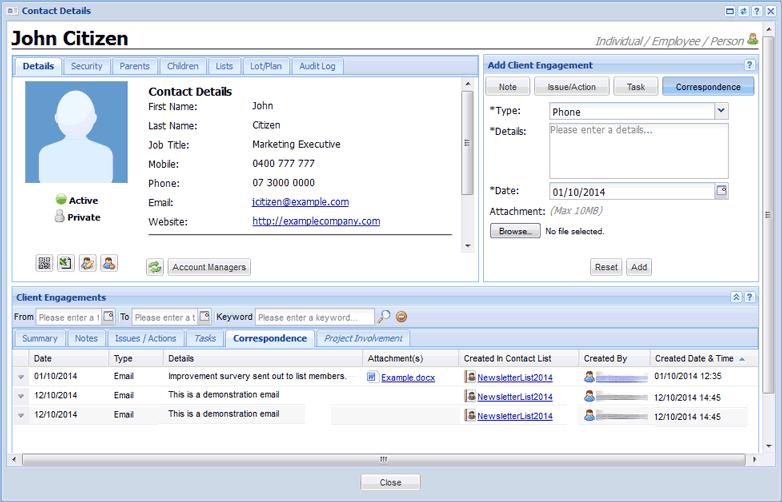
The Group Admin can edit and delete all contact list engagement items (notes, issues, actions and correspondence) regardless of who created them.
All users can only edit or delete the engagement items they have created. If you assigned a note been added to your or another contact's CRM record, you will be able to edit or delete these items. Users however cannot edit or delete contact list engagements items from another contacts' CRM contact that they didn't created. For example, if your Project Manager assigned an issue to you, you will not be able to delete this issue.
1. Open the relevant contact list.
2. Select the relevant tab E.g. Notes.
3. Select the menu arrow next to the item you wish to edit or delete.

4. Select Edit or Delete from the menu.

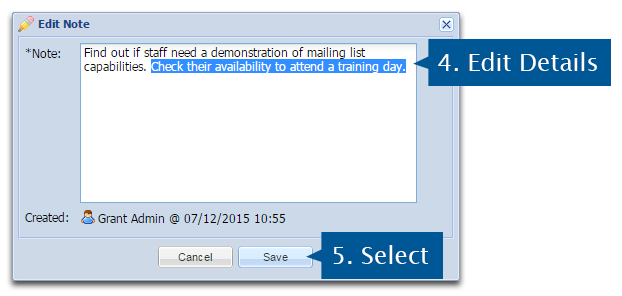
If editing:
5. Make the relevant changes.
6. Select Save to update the engagement item.
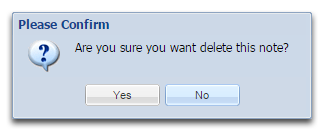
If deleting:
7. Select Yes when prompted.
CRM Contact Lists allow you to email all members of a list with a single click using the fileit@Enquire feature. The fileit@Enquire feature will save the a record of the correspondence to the contact list and also into each recipent's CRM contact record.
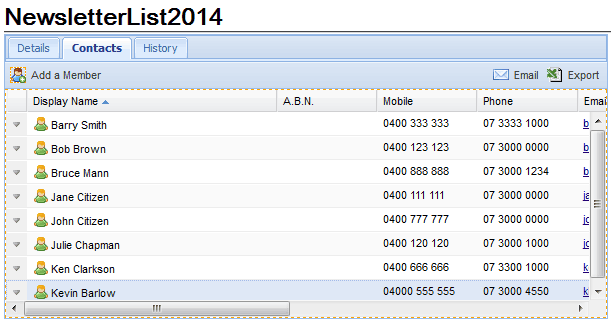
1. Open the relevant contact list.
2. Select the Contacts tab.
3. Select the Email button.
4. Select your preferred browser-based email (e.g. Yahoo, Gmail) or email client (e.g. Outlook, Thunderbird) from the Launch Application window. If your email application is not listed here, select the Choose button to locate the application within your computer.
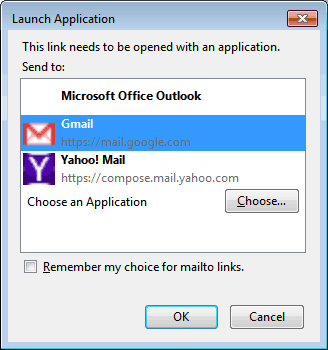
Note: You will be prompted to log into your browser-based email if it isn't already open in your current browser.
When the email application has been launched, Enquire will create a blank email. The email will be addressed to 'fileit@enquire.net.au' and newsletter recipients placed in the 'Bcc' field.
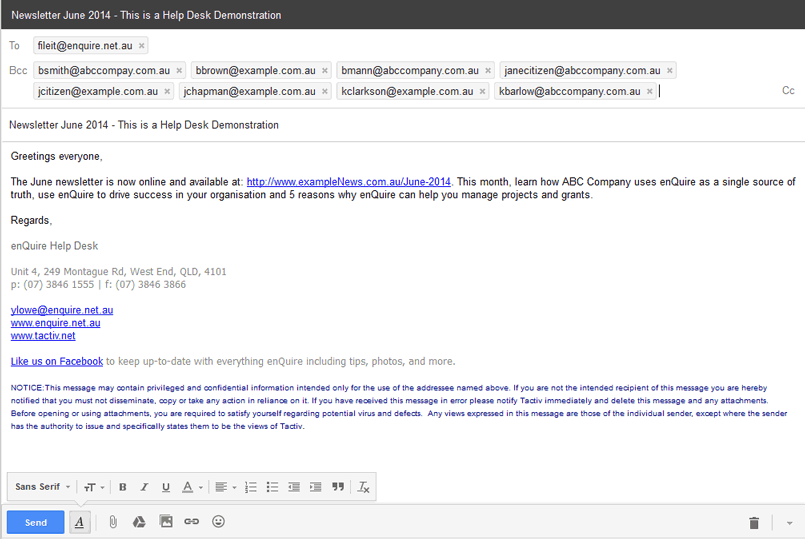
5. Enter the relevant information and send when required. Any attachments will also be saved to the recipients' CRM records.
The email will be saved to all the recipients' CRM records and contact list under the Client Engagement Correspondence tab. For more information on the fileit@enquire feature, please see our page on Capturing Email Correspondence.

Enquire CRM allows contact list members to be exported into Microsoft Excel for mailouts and archival purposes.
1. Open the relevant contact list.
2. Select the Contacts tab and then select the Export button.

3. Save and name the file in a location on your computer.
The following is a sample of data that can be exported from your contact list.
