The Contact Relationship Manager (CRM) is a sophisticated solution for managing information about users and contacts through the Enquire interface. It serves to capture contextual and on-going relationship information when dealing with organisations or individuals. Depending on the terminology used by your organisation, contact will refer to customer or client.

Some key Enquire CRM features are:
1. Parent and Child Contacts - An optional link between contacts via a Parent-Child relationship (unlimited in numbers and levels).
2. Public and Private Contacts - This is to set user visibility for staff or affiliate users from another groups.
3. Active and Inactive Contacts - When no longer needed, contacts can be marked as inactivate instead of deleted.
4. Create and manage Contact Lists - Connect with users, contacts and organisations to these lists.
5. Add and track client engagement information - Save any contact interaction within Enquire by recording a note, issue, action or correspondence item within a contact record or contact list. Users can automatically archive off emails, attachments and correspondence. Issues and actions can be organised by categories (categories are managed by the Group Admin).
6. Send an email within Enquire using your email client and automatically file the email as correspondence with fileit@enquire.
There are several contact types:
| Contact Type | Description | |

|
User | A person who is registered with Enquire, who is a member of your organisation or affiliate of another organisation, and has a role in Enquire. Users can be made private or public. |

|
Individual/ Employee/ Person | A person who is a member or an employee of an organisation or a person who your organisation regularly works with or contacts. These contacts are unable to log into Enquire. |

|
Sole trader/ Contractor | A person who is an external contractor or sole trader. They can be assigned roles that are higher than Delivery Area Manager. |

|
Organisation/ Company | An organisation who works with your organisation. Other contacts such as users, individuals or contractors will be affiliated with the organisation. An organisation cannot be an Enquire user. It can be made public or private. |

|
Office/ Branch/ Department | An office, branch or department of an organisation which has had its details entered into the system. Other contacts such as users, individuals or contractors will be affiliated with the office, branch or department. An office, branch or department cannot be an Enquire user. It can be made public or private. |
|
|
Applicant Portal contact | A person who has registered with the Applicant Portal in order to submit applications or whose details have been entered as a contact on the application form. |
To access the Contact Relationship Manager (CRM):
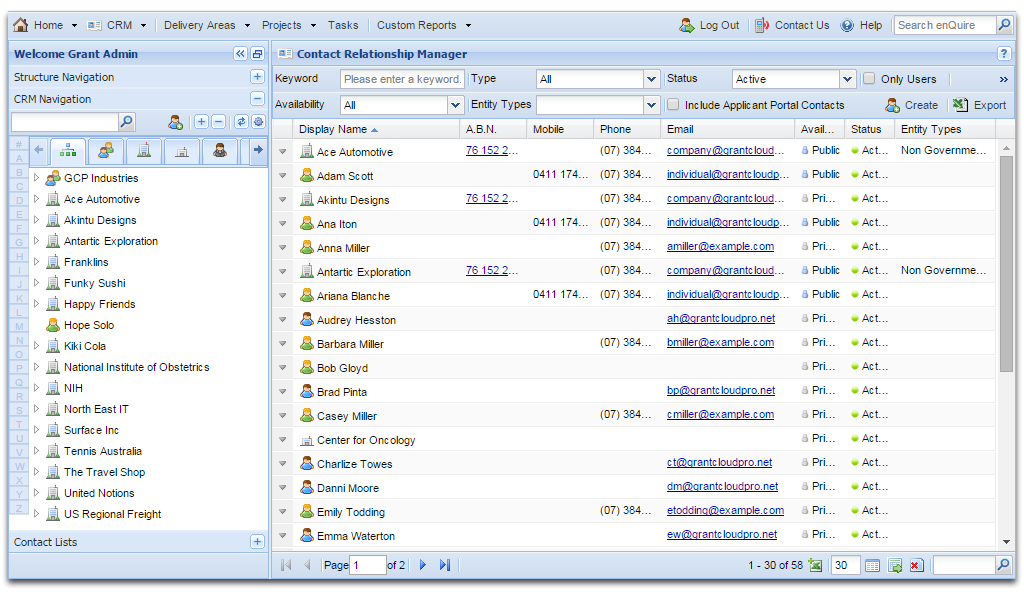
1. Select CRM from the Primary navigation bar. A list of all Contacts will display in the main window in alphabetical order.

OR
1. Select the double arrow button to expand the left hand navigation panel.
2. Select CRM Navigation.
3. Navigate CRM by selecting tabs for different contact views.
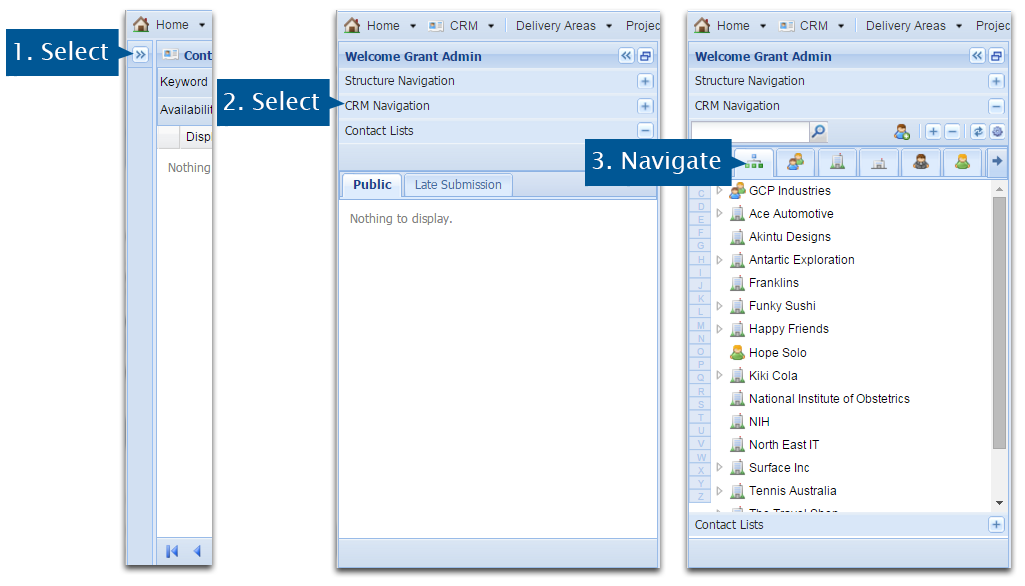
A list of all Contacts will display in the left hand CRM Navigation. The main window allows you to view and work in Enquire as you use the CRM Navigation.
For example, if working on a Project and need add a note to contact. You can use the left hand CRM Navigation to add this notification to the Contact Record while working on your Project. See more information on adding notes, tasks and correspondence items on Capture Client Interactions.
When you first open the CRM window, it will appear empty.

1. Select Search to populate the CRM. If you can't see the search button, go to Step 3.
2. Select 'Grid' to view contacts as a list, or select 'Card' to display contacts as contact cards.
List View:

Contact Card View:
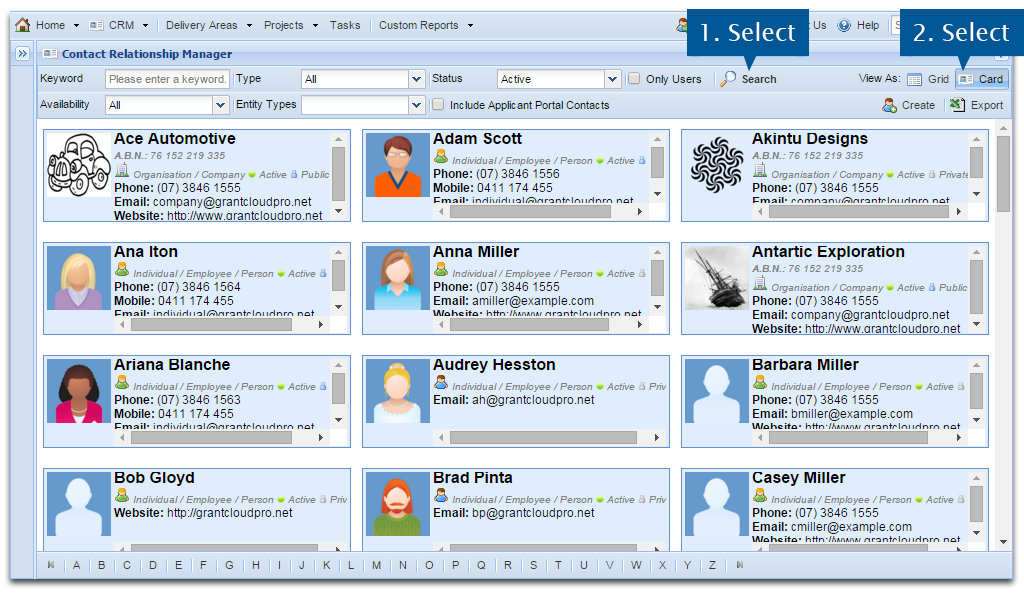
3. If you are working on a small screen, you may need to open a menu to select Search and display contacts as a Grid or as Cards.
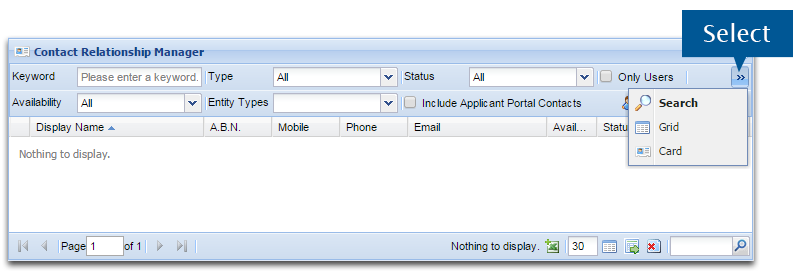
1. Select CRM from the primary navigation bar.

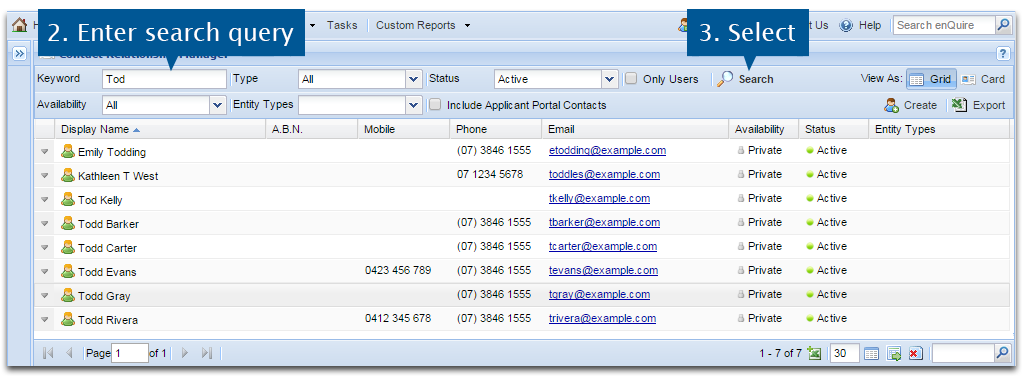
2. Use the detailed search toolbar to apply keywords and filters such as Group, Type, Availability and Status.
3. Select Search to perform your search.
If you are working on a small screen, you may need to open a menu to select Search and display contacts as a Grid or as Cards.

Once Entity Types have been assigned to contacts, they can be used as a search method through the CRM.
1. Select CRM from the primary navigation bar.

2. Select the Entity Types drop down menu from the search options bar.

3. Select the Entity Type/Types you wish to search by.
4. Select Ok to continue.

5. Select Search. Your search results will vary based on the options selected. In this example, the search located all contacts which have the Entity Type "Local Government" or "State Government".
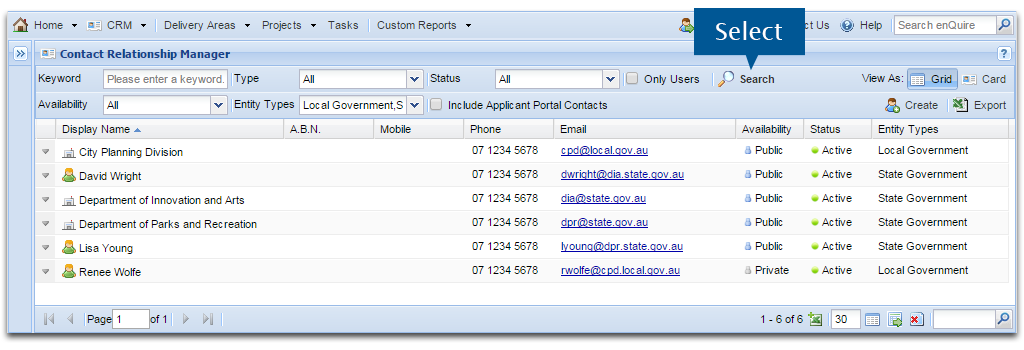
If you are working on a small screen, you may need to open a menu to select Search and display contacts as a Grid or as Cards.

The left hand CRM Navigation panel provides users with an organised view of the CR. You can access to contacts and search tools in the navigation panel while working within Enquire.
Important Features:
1. Quick Find search tool,
2. Contact Type and Search tabs,
3. "Jump To" Alphabetical Quick Bar.
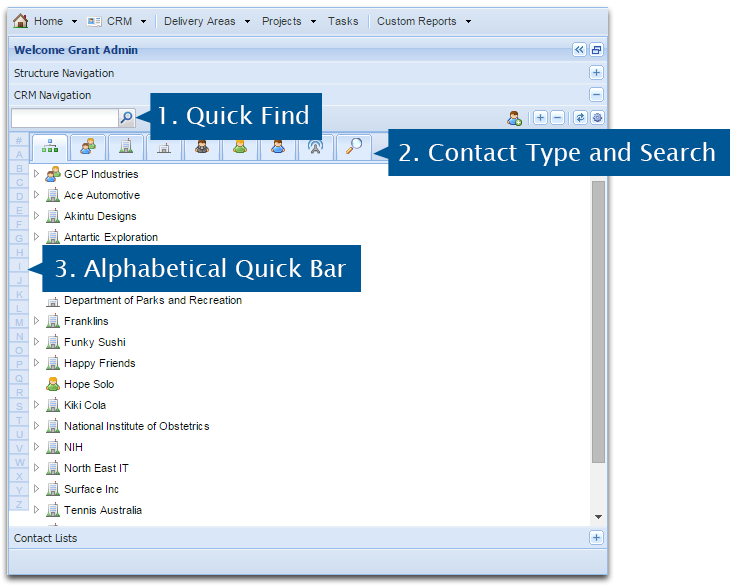
The tabs in the CRM Navigation panel can sort and search through the CRM to quickly display contacts.
| Tab | Description |
|
|
Display the full contact tree (entire CRM or up to 200 contacts) |
|
|
Display all users associated with my group |

|
Display all organisation and company contact types |

|
Display all office, branch and departmental contact types |

|
Display all sole trader and contractor contact types |

|
Display all individual and employee contact types |

|
Display all user contact types |
|
|
Display all applicant portal contacts |

|
Search for contacts using keyword, type, availability, status and entity types to locate contacts |
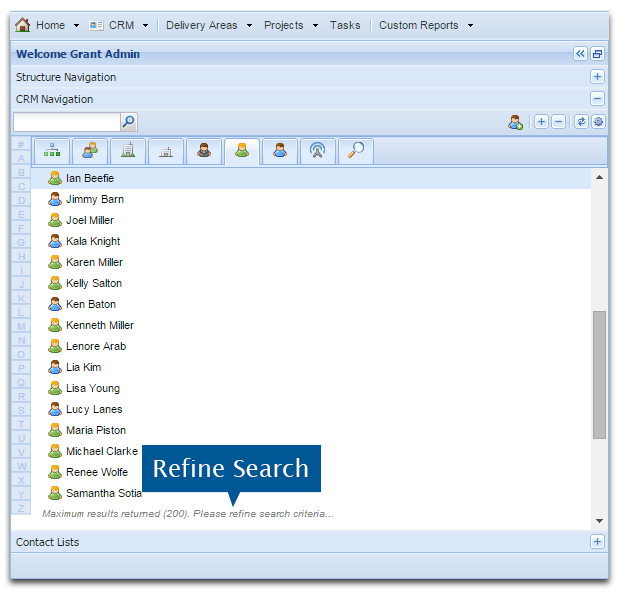
Note: The CRM Navigation panel can only display 200 contacts per tab. Please use the Quick Find function or the Contact Search tab to locate the relevant contacts.
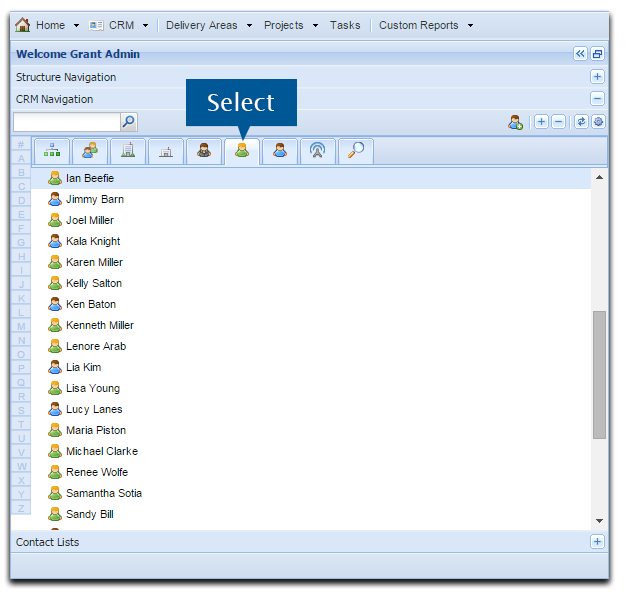
1. Select the view tabs to display contacts that fall under types such as Organisations, sole traders and users.
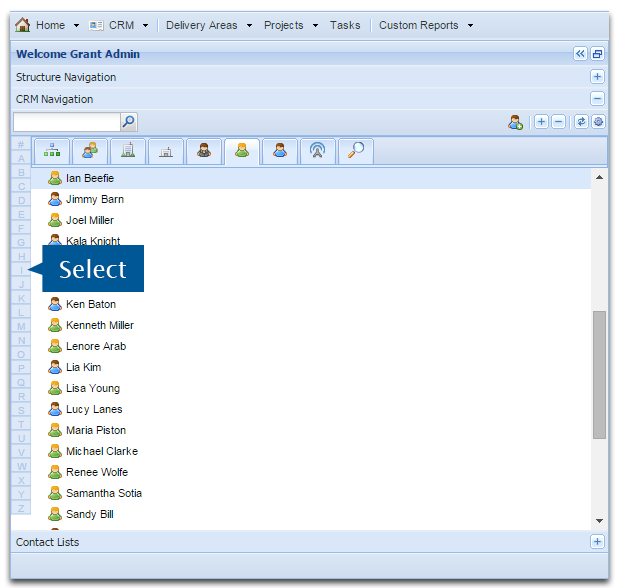
2. The alphabetical quick bar will jump to the first record in the view tab that starts with the letter selected. In this example, we selected "H" and the CRM Navigation jumps to the first contact that begins with "H" within the selected tab.
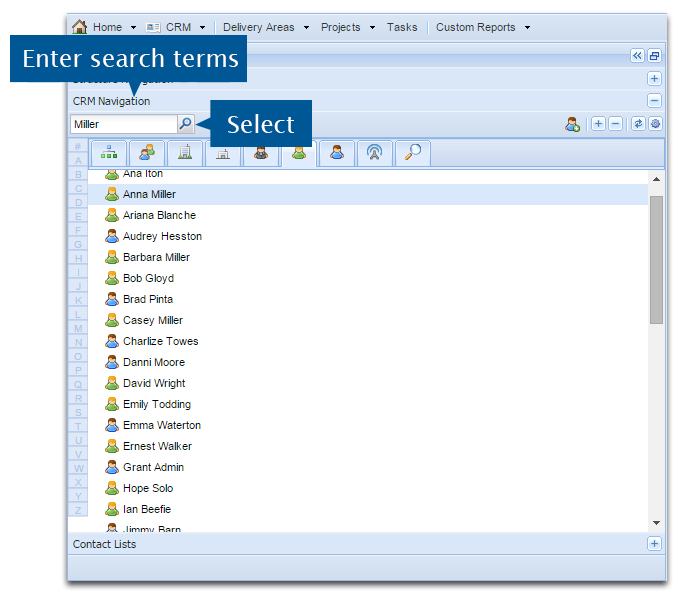
3. The Quick Find button will jump to the next contact that matches your search term and are categorised within the contact type. Select the magnifying class to jump to the next match. In this example, the search jumps to the next contact that matches the term "Miller" and is of the Individual/Employee/Person type.
Note: Holding down the Control key as you select the Quick Find button will allow you to search the CRM backwards (bottom to top)
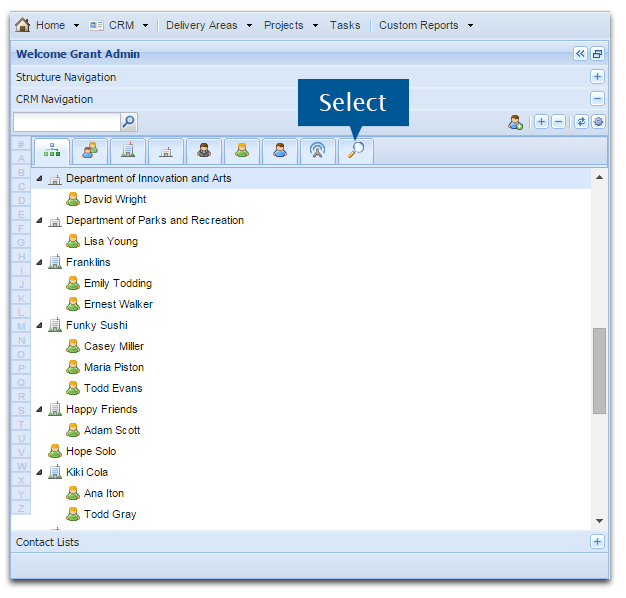
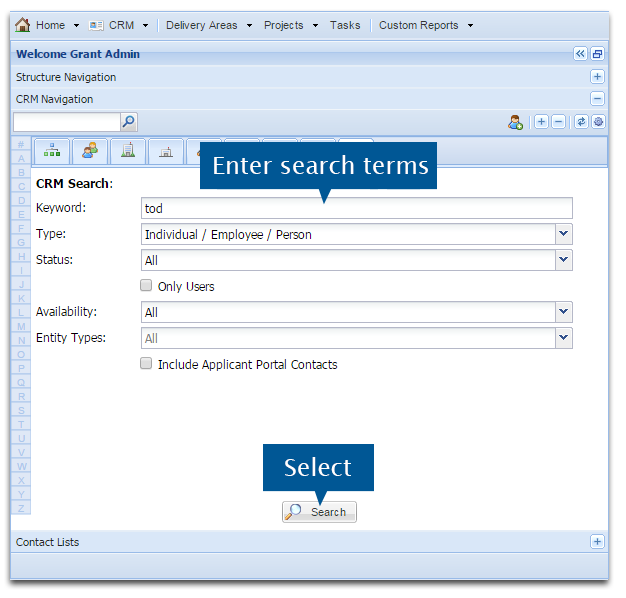
4. The Contact Search tab allows you to search for contacts using a keyword, contact type, availability status and entity types.
Your keyword will be used to find matches using the following information:
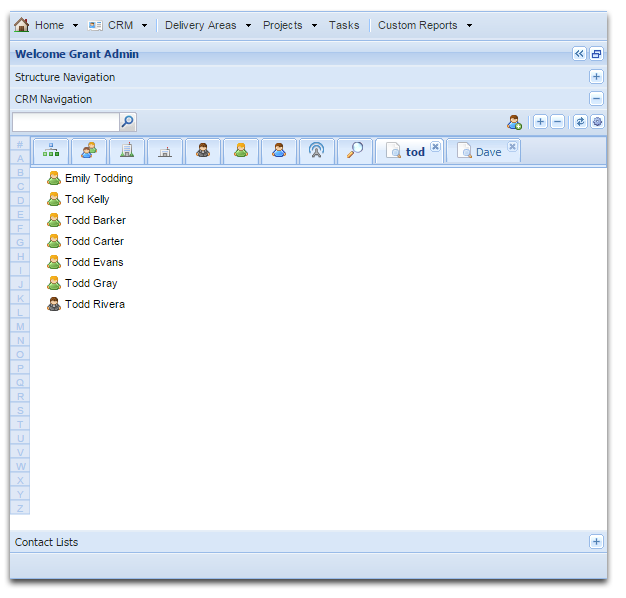
In this example, we searched for "Tod" and the Contact Search bought up contacts that matched the keyword. The results may not have a display name that contains or match "Tod" however their email addresses do contain "Tod".
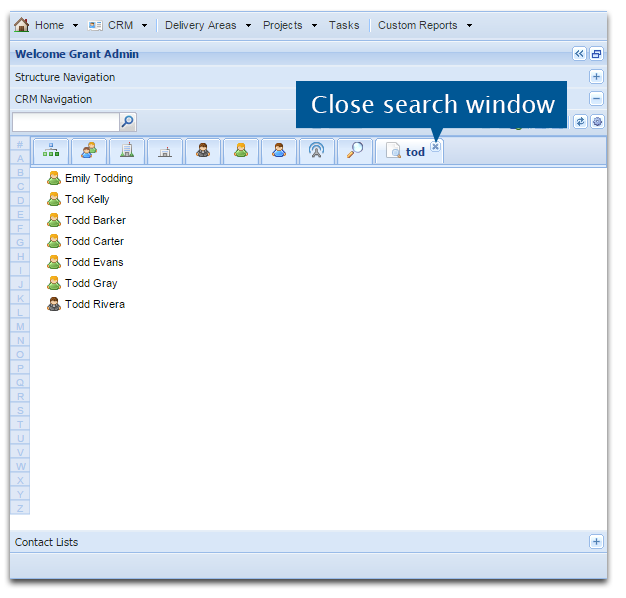
Note: The CRM Navigation can only display 200 contacts per tab and within search results if your organisation has an immense number of contacts. Your search terms and options will need to be refined if you are unable to locate your contact through the CRM Navigation.
Note: Some settings may not be available in your Enquire implementation as your version has been optimised by the Enquire team to improve performance for your organisation and users.
To change the Navigation Panel Settings:
1. Select the Cog icon on the CRM Navigation panel.
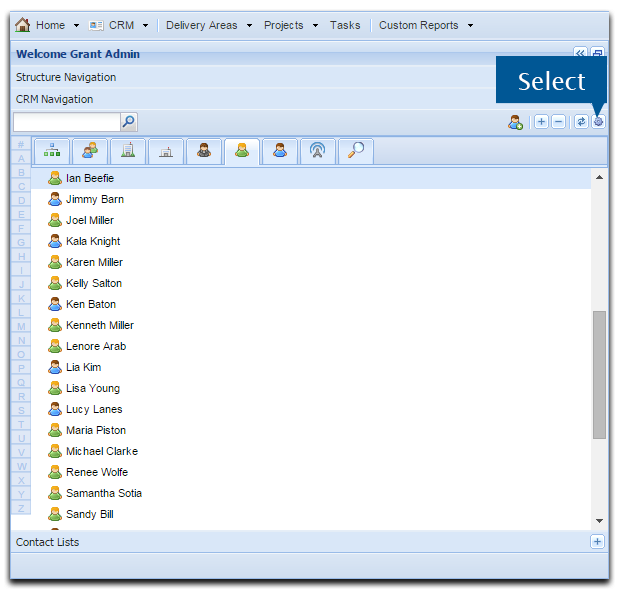
2. Select your preferred view options (for examples, see below).
3. Select Save.
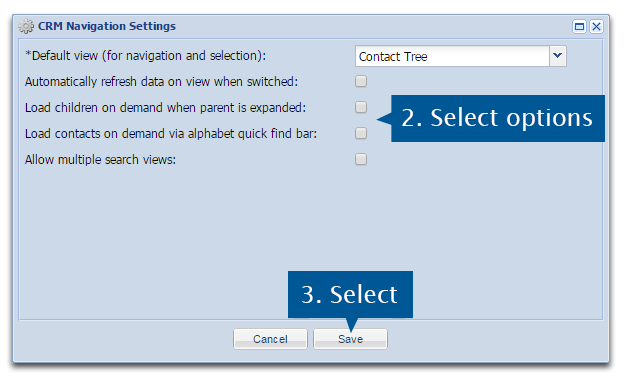
Default view (for navigation and selection)
Any view tab can be first one that is opened when the CRM Navigation loads. This is defaulted to be the Full Contact Tree tab.
Automatically refresh data on view when switched
Refreshes the CRM's data when you switch between view tabs or when the CRM Navigation is reopened.
Load children on demand when parent is expanded
On all tabs, load all child contacts when a parent contact is expanded. Children will be automatically hidden under parent contacts until the parent is expanded.
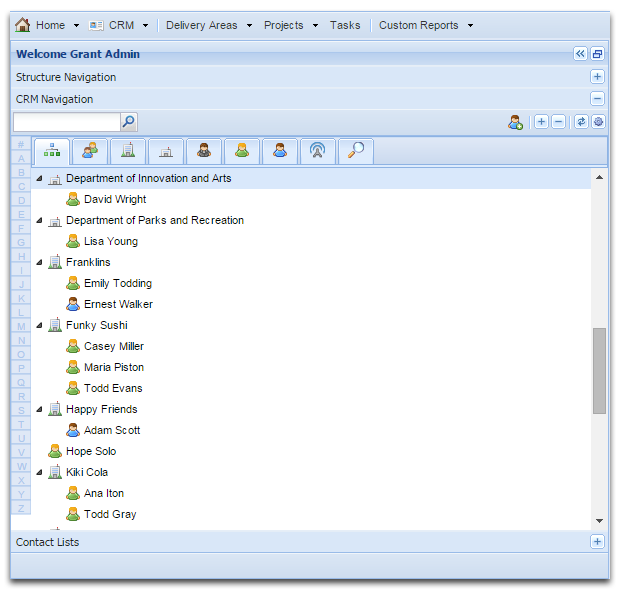
Load contacts on demand via alphabet quick find bar
If this option is active when the alphabet quick find bar is selected, Enquire will load only the contacts that start with the selected letters and falls within the tab's filter options. In this example, we have selected "T" and the Individual/Employee/Person tab. The CRM will only display the. contacts that fit this type and begin with "T".
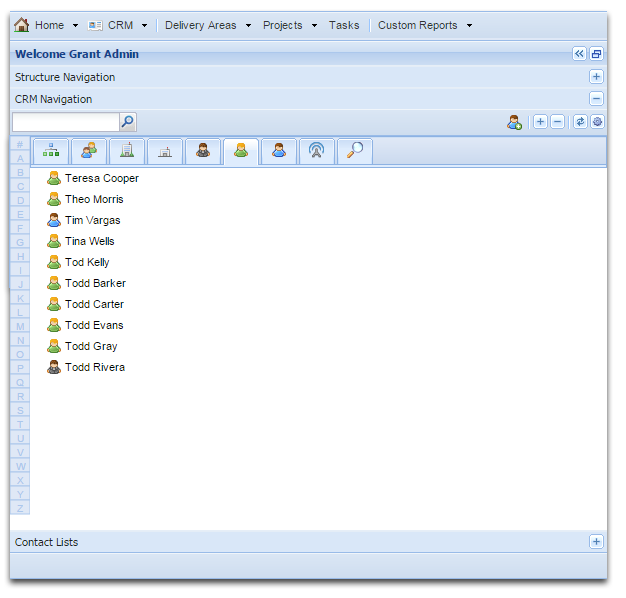
Note: If we move to another tab with "T" as the last selected letter, the next tab may appear empty if there are no contacts of that type starting with the letter "T".
Load all groups in group view
If this is selected, all groups that your organisation has links to will be loaded into the group view tab.
Allow multiple search views
Allows users to have multiple tabs with Contact Search results open. These will be removed when you log out of Enquire.
CRM data can be exported as Excel spreadsheets for review, mailing and archival purposes. Information about individual contacts or their parent and child links can be exported directly from their CRM records.
1. Select CRM from the primary navigation.

2. Use the detailed search toolbar to apply keywords and filters such as Group, Type, Availability and Status.
3. Select Search to perform your search.

If you are working on a small screen, you may need to open a menu to select Search and display contacts as a Grid or as Cards.

4. Select either the Export button from the menu bar or the Download Results button on the bottom of the page to export the search results .
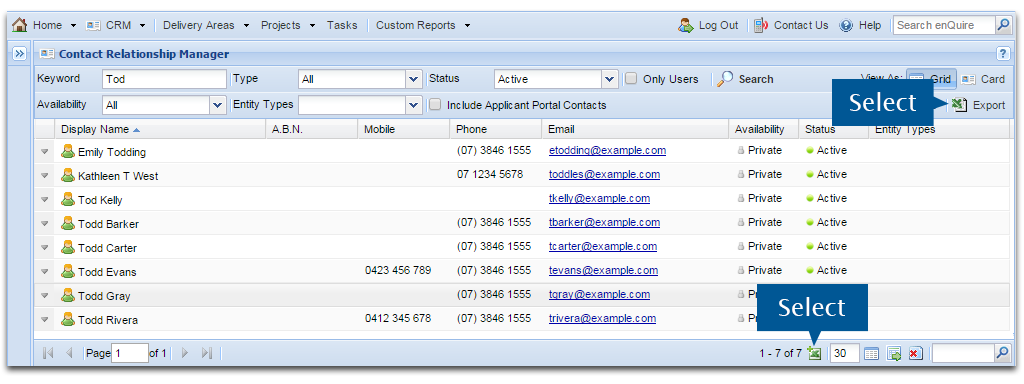
There are two spreadsheets that you can export from the CRM:
a. If you select the export button, you will receive a detailed spreadsheet that includes any User Defined Components you have added to CRM records.
b. If you select the download results button (bottom of page), you receive a spreadsheet that contains basic information about the contacts.
4. Save the file to a known location on your computer with a meaningful name.
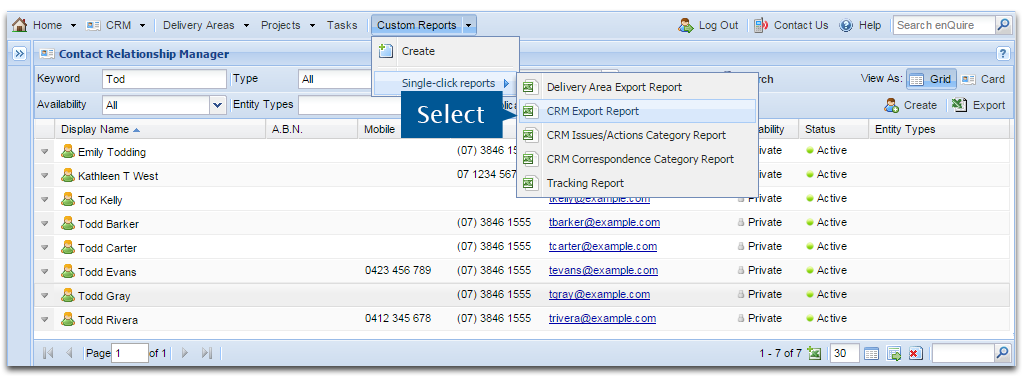
The spreadsheets exported via the CRM have a maximum limit of 5000 contacts. If your CRM database contains more than 5000 contacts, your group administrators can generate a single click report that contains the entire CRM database (CRM Export Report).
